How to Fix Laser Burn: Quick Steps
Laser burn can mean two very different things. One involves skin injury from cosmetic laser procedures, while the other refers to physical damage on CDs, DVDs, or Blu-ray discs. Whether you’re dealing with a painful red patch after laser hair removal or a scratched disc that won’t play, knowing how to fix laser burn is essential for quick recovery. This guide covers both types in full detail, from immediate first aid and dermatological treatments for skin burns to DIY repair methods for damaged optical discs.
Immediate Skin Burn Response
When a laser treatment goes wrong, acting fast limits the damage. Most skin laser burns occur due to excessive energy, poor cooling, or mismatched settings for your skin tone. The first few hours are critical for minimizing injury depth and preventing complications.
Cool the Burned Area Immediately
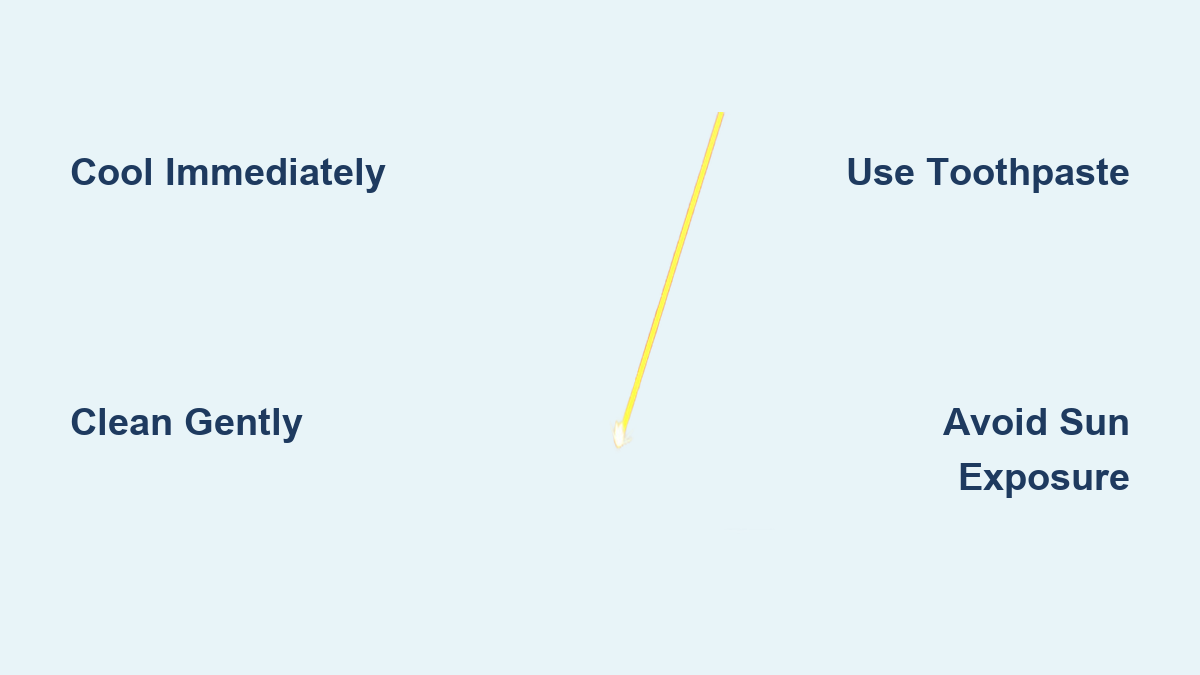
Apply cool water for 10 to 20 minutes using a clean cloth or gauze soaked in sterile saline. This reduces inflammation and prevents deeper tissue injury. Never use ice directly on the burn, as it can cause vasoconstriction and worsen healing.
Cooling slows thermal spread and minimizes blistering risk.
Clean Gently Without Irritation
Use a mild, fragrance-free cleanser or sterile saline. Avoid scrubbing the affected area. Pat dry with a soft towel. Harsh soaps, exfoliants, or alcohol-based products will delay healing and increase pigmentation risks.
Apply Soothing Topical Agents
Choose products that reduce inflammation and protect the skin barrier. Recommended options include:
• Aloe vera gel (pure): Soothes and supports re-epithelialization
• Raw honey (especially Manuka): Antibacterial and maintains moisture
• Aquaphor or Vaseline: Occlusive barrier to prevent drying
• Biafine Emulsion: FDA-approved for thermal injuries
Avoid toothpaste, butter, or alcohol-based solutions, as these can irritate or infect the skin.
Medical Treatments for Severe Burns
Not all laser burns heal at home. Deep or widespread injuries require professional care to avoid scarring and infection. Understanding when to seek help prevents long-term complications.
When to See a Dermatologist
Seek immediate medical attention if the burn covers more than 3 inches in diameter. Also seek care if it’s located on the face, hands, or joints, or shows blisters, open sores, or white or charred skin. Medical attention is needed for signs of infection, including pus, fever, or increasing redness, and if there’s no improvement after 7 days.
Third-degree burns may destroy nerve endings and appear painless, but this does not mean they are less serious.
Professional Topical Treatments
Dermatologists may prescribe specific medications for laser burn care. Common options include:
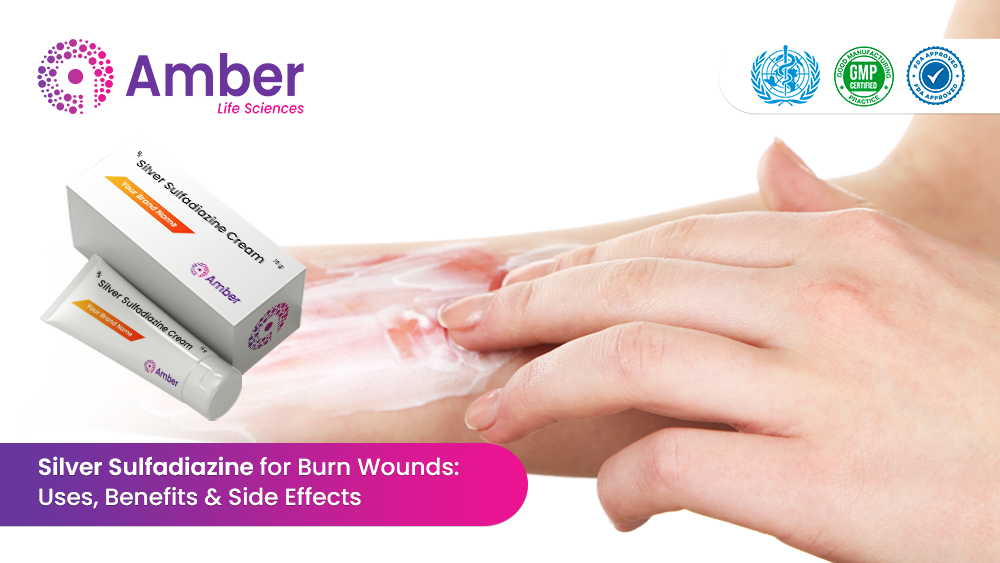
• Silver sulfadiazine (Silvadene): For partial-thickness burns, prevents infection
• Antibiotic ointments (e.g., mupirocin): For infected areas
• Topical corticosteroids (short-term): Only under medical supervision to avoid skin thinning
• HHfudic cream (mometasone plus fusidic acid): Reduces inflammation and bacteria
Prolonged steroid use can lead to rebound pigmentation, especially in darker skin tones.
Oral and Systemic Therapies
For pain and swelling, ibuprofen at 200 to 400 milligrams every 6 to 8 hours is recommended. Acetaminophen works if NSAIDs aren’t suitable. Oral antibiotics like cephalexin treat confirmed bacterial infection. Antivirals like acyclovir are recommended for facial burns due to herpes reactivation risk.
Managing Pigmentation Changes
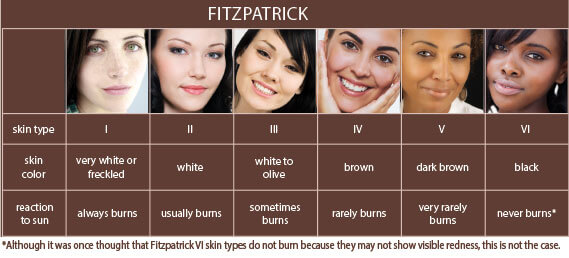
Post-inflammatory hyperpigmentation and hypopigmentation are common after laser burns, especially in Fitzpatrick skin types IV through VI. These changes appear weeks after healing and require specific treatment approaches.
Treat Hyperpigmentation Safely
PIH appears as dark spots after the skin heals. Effective treatments include:
• Hydroquinone (2 to 4 percent): Gold standard melanin inhibitor, use for 3 to 6 months maximum
• Azelaic acid (15 to 20 percent): Safe for long-term use
• Kojic acid and niacinamide (5 percent): Lighten pigmentation with minimal irritation
• Chemical peels (glycolic, salicylic, TCA): After full healing, performed under supervision
Start treatment only after the skin has fully re-epithelialized.
Address Hypopigmentation Early
Loss of pigment may be permanent. Treatment options include topical tacrolimus or pimecrolimus for stimulating melanocyte migration. Micropigmentation (cosmetic tattooing) camouflages white patches. Autologous melanocyte transplantation is experimental but promising for stable cases.
Long term my concern would be hypopigmentation, warns Dr. Brooke R. Seckel, MD.
Healing Timeline by Burn Severity
:max_bytes(150000):strip_icc()/stages-of-wound-healing-8750370-no-text-edit-f8f8a277f4804fcd964958598b51529d.jpg)
Recovery time varies significantly based on burn depth and skin type. Understanding expected healing windows helps set realistic expectations and identify complications early.
First-Degree Burns Heal Fast
Symptoms include redness, warmth, and mild pain. Healing time is 3 to 14 days with full recovery and no scarring. Care involves cooling, moisturizing, and sun protection.
Second-Degree Burns Take Weeks
Symptoms include blistering, swelling, and intense pain. Healing time ranges from 1 to 6 weeks, with risks of PIH, temporary hypopigmentation, and infection. Care requires non-adherent dressings, medical ointments, and daily monitoring.
Healing may take 4 to 8 weeks in darker skin tones.
Third-Degree Burns Require Medical Intervention
Symptoms include white, leathery, or charred skin, possibly with no pain due to nerve destruction. Healing time is months, with high scarring risk possibly requiring grafting. Care demands burn specialist referral, wound debridement, and possibly reconstructive surgery.
These are rare but possible with unlicensed devices or operator error.
Prevent Future Laser Skin Burns
Most laser burns are preventable with proper screening and technique. Taking these precautions protects your skin during cosmetic procedures.
Choose a Qualified Provider
Select clinics with board-certified dermatologists. Ensure a Medical Director oversees treatments. Confirm they perform a test patch 24 to 48 hours before the full session.
Skip clinics that rush you into treatment without a patch test.
Prepare Your Skin Properly
Avoid sun exposure, tanning beds, or self-tanners for 4 to 6 weeks before treatment. Stop using retinoids, AHAs, and benzoyl peroxide 7 days prior. Disclose all medications, especially tetracyclines or NSAIDs.
Use the Right Laser for Your Skin
Nd:YAG (1064 nm) lasers are safest for darker skin types (IV through VI). Avoid Alexandrite lasers on tanned or pigmented skin. Ensure the device has real-time cooling and skin sensors.
For ethnic skin, a test treatment should be considered with very conservative energy setting, advises Dr. William Ting, MD.
Optimize At-Home Recovery
After professional care, home habits significantly impact healing outcomes. Proper recovery routines prevent complications and support skin regeneration.
Protect Against Sun Exposure
UV light worsens pigmentation and delays healing. Use broad-spectrum SPF 30 or higher daily, even indoors. Wear wide-brimmed hats and UPF clothing. Avoid peak sun hours between 10 a.m. and 4 p.m.
Sun protection is non-negotiable during recovery.
Support Healing with Nutrition
Vitamin C supports collagen synthesis and wound healing. Zinc reduces inflammation and speeds repair. Hydration maintains skin elasticity and function.
Do Not Resume Treatments Too Soon
Wait 6 to 8 weeks after full healing before any new laser sessions. Premature treatments increase risks of repeat injury and scarring.
Repair Laser-Damaged Optical Discs
The term laser burn also refers to physical damage on CDs, DVDs, or Blu-rays, often caused by scratches, oxidation, or faulty players. Understanding how to fix laser burn on discs saves money and preserves irreplaceable data.
Diagnose Disc Damage Correctly
Symptoms include playback skipping, freezing, or error messages. Visible dark spots or concentric scratches appear on the surface. The disc may read in one device but not another.
True laser burn from players is rare. Most damage is mechanical or environmental.
Fix Scratches with Toothpaste Method

A simple, effective DIY fix exists for minor disc damage. This method works well for recent, superficial scratches.
Apply Non-Gel Toothpaste
Use a pea-sized amount of non-gel toothpaste (with mild abrasives like calcium carbonate) on the shiny data side. Spread using straight-line motions from center to edge. Never use circular motions, as this creates radial scratches that worsen damage.
Soak and Rinse Gently
Rinse under lukewarm running water for 30 minutes. For deeper damage, extend the soak by 5 to 10 minutes. Gently rinse while leaving a thin film of toothpaste to continue polishing.
Dry and Polish Properly
Wipe with a microfiber cloth, moving from center outward. Do not use paper towels or abrasive materials.
Test the Disc
Insert into a PC, Xbox, or DVD player to check functionality. Repeat the process 2 to 3 times if needed.
Success rates are high for recent, superficial damage.
Alternative Disc Repair Options
When toothpaste isn’t enough, these methods offer additional solutions.
Banana Peel Trick
Rub the inner side of a banana peel on the disc. Natural oils and mild abrasives may fill minor scratches. Wipe clean with microfiber. This method is anecdotal but low-risk.
Baking Soda Paste
Mix 2 parts baking soda with 1 part water. Apply like toothpaste using straight-line motions. This method is more abrasive, so use cautiously.
Commercial Repair Kits
Devices like SkipDr or Disc Rescue use motorized polishing. They are effective for deep scratches but cost $30 to $60.
Best for frequently used discs.
Professional Data Recovery
For critical data on unreadable discs, professional services use clean rooms and laser resurfacing. Success rates are high but expensive ($100 or more). This option is recommended only for irreplaceable files.
Prevent Disc Damage Long-Term
Proper handling and storage extend disc life and prevent future damage.
Clean Discs Regularly
Use a microfiber cloth and isopropyl alcohol. Wipe from center to edge in straight lines.
Store Discs Properly
Keep discs in jewel cases, stored vertically. Avoid heat, humidity, and direct sunlight. Never touch the data side.
Maintain Your Player
Use disc cleaning kits if your player frequently skips or fails to read discs. A dirty lens can mimic disc damage.
Frequently Asked Questions About How to Fix Laser Burn
How long does it take for a laser burn on skin to heal?
Healing time depends on burn severity. First-degree burns heal in 3 to 14 days. Second-degree burns take 1 to 6 weeks. Third-degree burns require months of treatment. Darker skin tones may experience healing delays of 4 to 8 weeks.
Can toothpaste fix a scratched DVD or Blu-ray?
Toothpaste works well for minor scratches on CDs, DVDs, and Blu-rays. Use non-gel toothpaste with mild abrasives. Apply in straight-line motions from center to edge. Rinse thoroughly and test the disc. This method works best on recent, superficial damage.
What does laser burn look like on skin?
Laser burn appears as redness, swelling, or blistering in the pattern of the laser applicator. Severe burns show white, leathery, or charred skin. The area may be painful or, in third-degree burns, surprisingly painless due to nerve damage.
Should I see a dermatologist for a laser burn?
See a dermatologist if the burn exceeds 3 inches in diameter. Also seek care for burns on the face, hands, or joints. Immediate attention is needed for blisters, open sores, white or charred skin, signs of infection, or lack of improvement after 7 days.
Can laser burns cause permanent scarring?
First-degree burns cause no scarring. Second-degree burns may cause temporary pigmentation changes. Third-degree burns carry high scarring risk and often require reconstructive surgery. Proper immediate care reduces complication risks.
How do I prevent laser burns during cosmetic procedures?
Choose a qualified provider with board-certified dermatologists. Insist on a test patch 24 to 48 hours before treatment. Avoid sun exposure for 4 to 6 weeks prior. Disclose all medications and medical history. Ensure the clinic uses appropriate lasers for your skin type.
Key Takeaways for Fixing Laser Burn
Whether treating a skin burn or rescuing a scratched disc, the key to fixing laser burn lies in prompt action, correct diagnosis, and prevention. For skin burns, prioritize cooling within the first few hours, protect against sun exposure, and seek dermatologist guidance, especially for darker skin tones. Choose qualified providers who perform test patches and use appropriate laser wavelengths for your skin type. Wait 6 to 8 weeks after full healing before resuming any laser treatments.
For optical discs, the toothpaste method works wonders on minor damage. Apply non-gel toothpaste in straight-line motions from center to edge, rinse thoroughly, and test the disc. Know the method’s limits, as deep scratches or delamination require professional data recovery. Always handle discs carefully, store them properly, and maintain your player to prevent future issues.