How to Use a Laser Level on a Tripod
Setting up a laser level on a tripod is one of the most effective ways to achieve precise, repeatable alignment for construction, landscaping, or DIY projects. Whether you’re leveling a deck, installing tiles, or grading a driveway, this system replaces guesswork with accuracy. The laser projects a consistent reference plane, while the tripod ensures stability and adjustability. When used correctly, it eliminates errors common with spirit levels and string lines. In this guide, you’ll learn every step from tripod setup to advanced outdoor applications so you can confidently use a laser level on a tripod for any project, indoors or out.
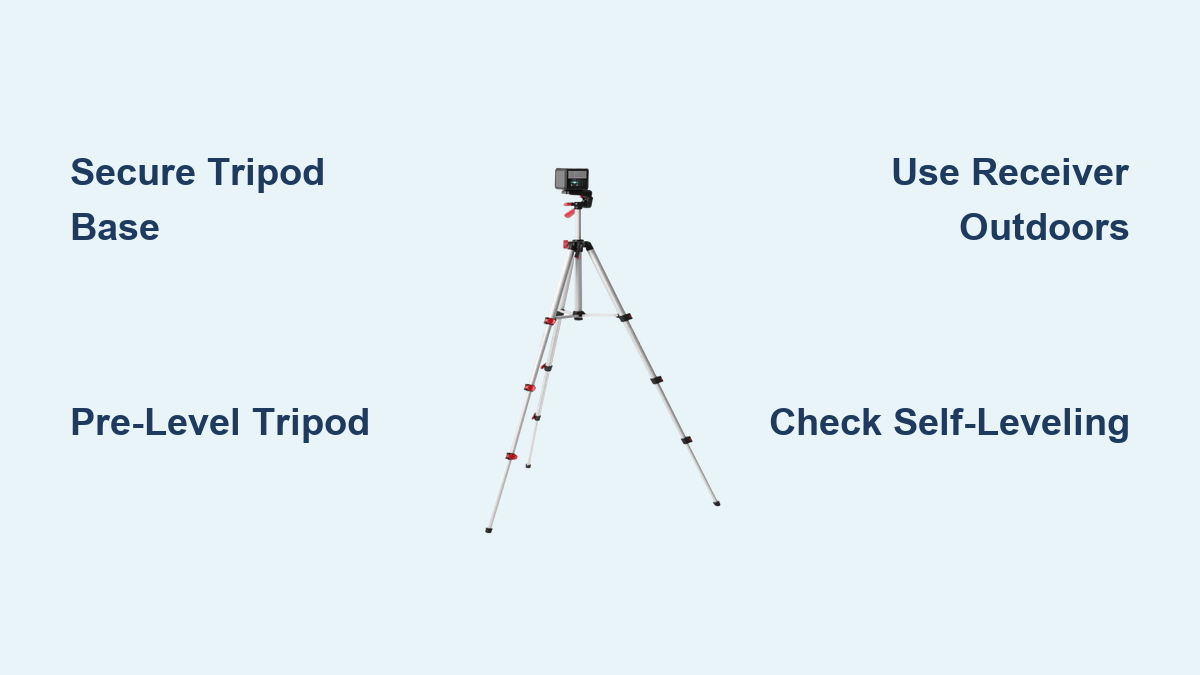
Position the Tripod Securely
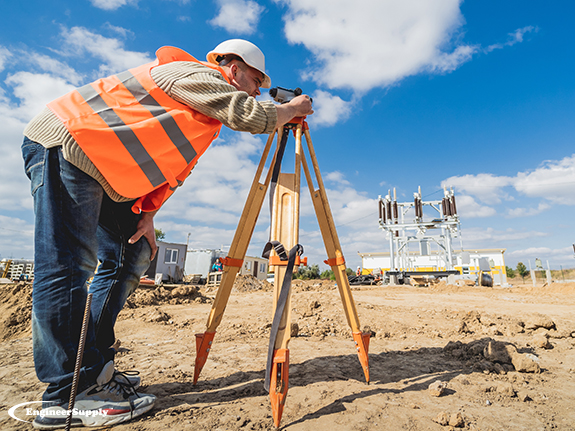
Proper tripod placement is the foundation of accurate laser leveling. A unstable setup leads to measurement errors that compound across your entire project. Taking extra time to secure the tripod pays dividends in precision.
Choose Stable Ground First
Always place the tripod on firm, level ground. Avoid soft soil, gravel, or sloped surfaces that can shift under weight. If working on grass or dirt, use tripods with spiked feet to anchor into the surface. For concrete or pavement, ensure rubber feet have full contact. Never set up near foot traffic, equipment vibration, or windy areas that could knock the unit off balance.
Spread Legs for Maximum Stability
Open the tripod legs wide to lower the center of gravity and increase stability. A wider stance prevents tipping, especially when extending the height. Most professional tripods allow two to three leg angle settings. Select the widest unless space is restricted. Lock each leg’s spread clamp securely after positioning.
Pre-Level the Tripod Base
Use built-in spirit levels to roughly level the tripod before mounting the laser. Check both the bullseye circular vial for all-around leveling and the linear vial for directional accuracy. Adjust individual leg lengths until the bubble is centered. Aim to get within plus or minus four degrees of true level. This is critical for self-leveling lasers, which typically only correct up to plus or minus five degrees.
Mount the Laser Correctly
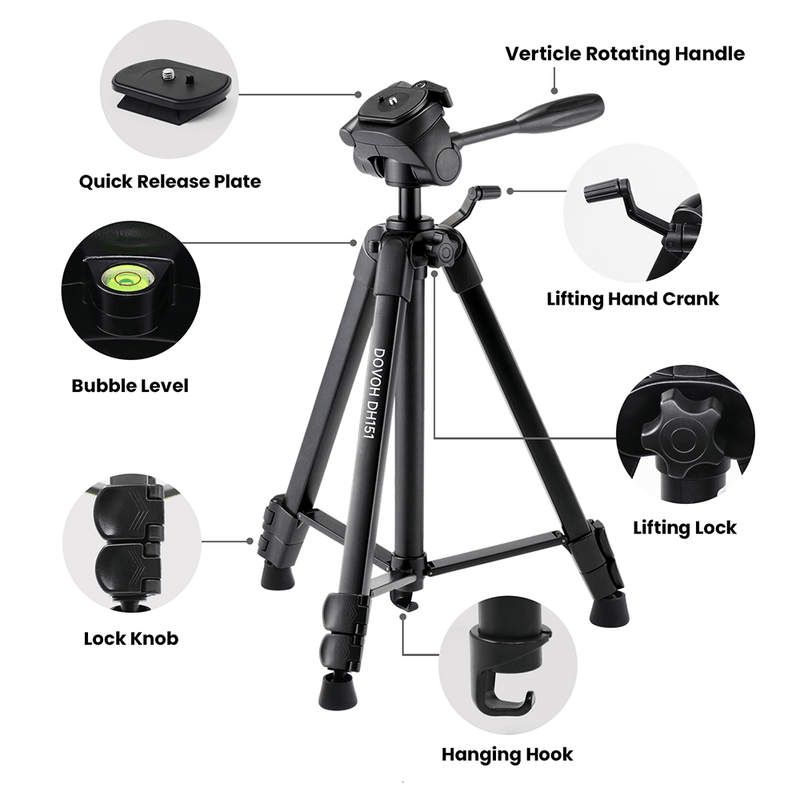
Secure mounting ensures the laser stays precisely aligned throughout your project. A loose or improperly attached unit can drift, creating costly errors in your work.
Attach Using Quick-Release Plate
Start by detaching the mounting plate from the laser unit. Press the latch and slide it off. Insert the plate into the tripod’s mounting head, aligning the square base with the socket. Tighten the wing nut to secure it. Then, slide the laser onto the plate until it clicks into place. Push down firmly and engage the locking latch to prevent accidental detachment.
This quick-release system is standard across Bosch, HUPAR, Johnson, and most major brands.
Verify Mounting Thread Compatibility
Ensure your laser and tripod share compatible threading. Either one quarter inch by twenty threads per inch for lighter models or five eighths inch by eleven threads per inch for rotating lasers. Adapters are available if mismatched, but a direct fit ensures maximum rigidity. Never force-thread connections. Hand-tighten only, then secure with the locking mechanism.
Power On and Self-Level
Getting the laser to properly calibrate is essential before taking any measurements. Understanding the self-leveling process prevents frustration and ensures accurate results.
Wait for Auto-Calibration
Turn on the laser and allow five to ten seconds for the internal pendulum or motorized system to self-level. During this time, the laser may flash or beep. This indicates the unit is adjusting. Once stable, the beam will lock into place and emit a steady line or continuous rotation, often accompanied by a solid green indicator light.
If flashing continues beyond fifteen seconds, the tripod is likely outside the self-leveling range. Recheck base leveling.
Handle Non-Self-Leveling Models
If your laser lacks auto-leveling, use the built-in bubble vials. These are usually dual-axis, covering horizontal and vertical adjustments. Locate the adjustment knobs near each vial and turn them slowly until both bubbles center between the marks. Recheck after any movement or bump.
Set Reference Points Accurately
Establishing reliable reference points transforms a laser level from a simple alignment tool into a comprehensive measurement system. This step is what enables professional-grade accuracy across large projects.
Align to Known Height or Datum
Before beginning work, establish a reference point. For example, mark a wall at four feet high or drive a stake into the ground at finished floor level. Position the laser so its beam passes through this point. Adjust the tripod height or laser position until alignment is perfect. This becomes your baseline for all future measurements.
Create Permanent Datum Marks
For multi-day jobs, set a permanent datum. Drive a screw into a fence post or attach tape to a pipe at the beam height. Label it clearly. You can return to this mark later to re-establish the exact same level, even if the laser has been moved or powered off.
This technique ensures consistency across large sites or phased construction.
Use Receiver for Outdoor Work

Outdoor environments present unique challenges for laser leveling. Bright sunlight can render the beam invisible, and long distances require additional equipment for accuracy.
When to Use a Laser Detector
In bright sunlight, the laser beam becomes invisible to the naked eye. That’s when you need a receiver, also called a detector. It’s essential for outdoor grading, foundation work, or long-distance layout beyond ten meters. Pair it with a measuring rod, also called a staff, to find exact elevations.
Attach Receiver to Measuring Rod
Clip the detector onto the staff using the built-in clamp. Ensure it is vertical and secure. Wear tinted laser safety goggles to help trace the beam path. Power on the receiver and set it to pulse mode if working at long range.
Find the Laser Plane
Walk to your target location with the staff. Slowly move the receiver up and down until it emits a steady beep and solid light. This means it has locked onto the laser plane. The bottom of the staff now represents a known elevation relative to the laser.
Use this to mark cut and fill points, set formwork, or verify slope.
Apply to Common Projects
Laser levels on tripods excel across a wide range of applications. These practical examples demonstrate how to translate setup skills into real-world results.
Grade a Driveway or Yard
Set the laser on a stable tripod and let it self-level. At a starting point, like a curb, place the staff and adjust the receiver until it beeps. Note the ground’s current height. For example, say it is sixty millimeters below grade. Add fill material, then recheck. When the receiver beeps again, the surface is at the correct level.
Repeat across a grid pattern for uniform grading.
Set Slope for Drainage
To create a fall, for example one inch per ten feet, start at the high end. Place the staff and lock the receiver at beam height. Move to the endpoint and raise the receiver by the required drop. For example, plus ten inches. Raise or lower the staff until the receiver beeps. The bottom of the rod now marks the lower elevation for proper drainage.
This is ideal for patios, sidewalks, and French drains.
Hang Shelves or Install Tile
Indoors, use the laser to project a straight horizontal line at your desired height. Make a reference mark on the wall. For example, forty-eight inches from the floor. Then adjust the tripod so the beam hits it. Once locked, use the line to align shelf brackets, picture hooks, or tile edges. All perfectly level.
For ninety-degree corners, use a cross-line or laser square model.
Optimize Accuracy and Visibility
Maximizing performance requires understanding environmental factors that affect laser accuracy. These techniques help you maintain precision even in challenging conditions.
Boost Outdoor Performance
In daylight, wear laser-enhancing goggles to see the beam path. Use pulse mode with the detector for better long-range sensitivity. Avoid aiming at reflective surfaces like glass or metal, which can scatter the beam and cause false readings.
Prevent Measurement Errors
Recheck tripod stability every thirty minutes, especially outdoors. Shield the unit from wind and accidental bumps. Avoid setting up over hot surfaces, like asphalt, where heat shimmer distorts the beam. If the laser is moved, power it off and restart to recalibrate.
Thermal expansion can affect accuracy. Work during cooler parts of the day when possible.
Maintain Equipment Properly
Regular maintenance ensures your laser level and tripod deliver consistent accuracy project after project. Proper care also extends the lifespan of your investment.
Check Batteries and Power
Use high-quality alkaline or lithium batteries for longer runtime and stable output. The HUPAR RL300HVG, for example, runs over twenty-four hours on a full charge. Always carry spares. Turn off the laser when not in use for more than a few minutes.
Clean and Store Safely
After use, wipe the lens with a microfiber cloth. Never use abrasive cleaners. Store the laser and tripod in a padded case to protect against impacts and moisture. Keep the quick-release plate attached to either the laser or tripod to avoid loss.
Regular maintenance extends device life and ensures consistent performance.
Troubleshoot Common Issues
Even well-maintained equipment can encounter problems. Knowing how to diagnose and resolve common issues keeps your project moving forward.
Laser Keeps Flashing
A continuously flashing beam means the unit is out of self-leveling range. Recheck the tripod’s base level using the built-in vials. Adjust leg lengths until the bubble is centered. Avoid setting up on uneven or soft ground.
Receiver Won’t Detect Beam
First, confirm the laser is on and rotating if applicable. Ensure the receiver is within range. Most work up to one hundred meters with detector. Check battery levels in both devices. Align the receiver directly in the beam path and move slowly up and down.
Beam Looks Dotted or Broken
Rotating lasers often appear as a dotted line when viewed directly. This is normal. For precision work, always use a receiver. In bright light, the beam may seem invisible. This is why detectors and goggles are essential outdoors.
Key Takeaways for Using Laser Levels on Tripods
Using a laser level on a tripod transforms complex leveling tasks into simple, repeatable processes. The system provides a stable, adjustable platform that delivers professional-grade accuracy for both indoor and outdoor projects. Remember to always start with a securely positioned tripod on stable ground, pre-level the base within plus or minus four degrees, and verify thread compatibility between your laser and tripod mounting system.
For outdoor work exceeding ten meters or in bright conditions, a receiver and measuring rod become essential tools. Establish permanent datum points for multi-day projects to ensure consistency across all phases. Recheck your setup periodically, especially when working outdoors or over extended periods.
With proper setup, calibration, and technique, you will achieve precise results every time. This saves time, reduces material waste, and ensures structural accuracy across any project from hanging shelves to grading driveways.
Frequently Asked Questions About Using Laser Levels on Tripods
What type of tripod do I need for a laser level?
Most laser levels use standard tripod mounts with either one quarter inch by twenty threads per inch for lighter models or five eighths inch by eleven threads per inch for rotating lasers. Ensure your tripod matches your laser specifications or use an adapter for compatibility.
How do I know if my laser level is properly self-leveled?
After powering on, wait five to ten seconds. A steady beam with a solid green indicator light confirms successful self-leveling. Continuous flashing indicates the unit is outside its leveling range, requiring you to re-adjust the tripod base.
Can I use a laser level outdoors in bright sunlight?
Yes, but you need a laser detector or receiver. The beam becomes invisible to the naked eye in bright conditions. The detector emits an audible beep when it locks onto the laser plane, allowing you to work accurately outdoors.
How accurate is a laser level on a tripod?
Most professional laser levels offer accuracy of approximately plus or minus thirty millimeters at thirty meters. This precision exceeds traditional spirit levels and string lines, making it suitable for construction, landscaping, and DIY projects.
Why does my laser beam appear as dots instead of a continuous line?
This is normal for rotating laser levels when viewed directly. The dots merge into a continuous line only when viewed through a receiver or detector. Always use a receiver for precise measurements.
How often should I recheck the tripod stability during a project?
Recheck tripod stability every thirty minutes, especially for outdoor projects. Wind, equipment vibration, or accidental bumps can shift the setup. Always recalibrate by powering off and restarting the laser if it has been moved.