How to Set Up a Vinyl Cutter
You just unboxed a shiny new vinyl cutter, and you’re itching to start crafting decals, signs, or custom apparel. But here’s the catch: skipping proper setup leads to torn vinyl, jagged edges, and wasted material. Learning how to set up a vinyl cutter correctly saves you hours of frustration and dollars in ruined supplies.
This guide walks you through every step, from workspace prep to your first successful cut. You’ll learn how to install blades, load materials, configure software, and calibrate settings for both mat-based and roll-fed machines. Whether you own a Silhouette Cameo or a professional Graphtec plotter, you’ll finish this article ready to produce crisp, accurate cuts on your very first try.
Prepare Your Workspace and Equipment
A clean, stable environment is the foundation of every successful vinyl project. Vibration, dust, and clutter cause misaligned cuts and feeding errors that ruin material.
Choose a Stable, Level Surface
Place your cutter on a sturdy desk or table that doesn’t wobble. Leave clearance behind the machine (6 to 12 inches) so roll-fed vinyl feeds smoothly. Keep both sides accessible for pinch rollers and control panels. For mat-based models, allow room in front to safely eject cutting mats.
Organize Power and Ventilation
Plug your cutter into a reliable outlet using the original adapter. Keep cords tucked away from walkways. While vinyl cutters don’t produce harmful fumes, a well-ventilated space helps when working with adhesives and cleaning solutions later.
Install the Right Cutting Blade

The blade is the most critical component in your setup. A loose or wrong blade causes dragging, incomplete cuts, and damaged backing liners.
Select the Correct Blade Type
Match your blade to the material you plan to cut:
• Standard blade: Works for adhesive vinyl, HTV, and cardstock
• Deep-cut blade: Handles thicker materials like reflective vinyl or layered designs
• Ratchet blade (Silhouette systems): Offers adjustable depth for fine control
Always check your machine manual for compatible blade options.
Insert and Secure the Blade Properly
Follow these steps for safe, accurate blade installation:
1. Open the blade holder by loosening the retention screw or clamp
2. Insert the blade fully into the housing until it seats
3. Tighten the screw firmly. A loose blade wobbles and ruins cut precision
4. Adjust blade depth based on material thickness (1 to 2 mm works for standard vinyl)
Always run a test cut after installing a new blade. Even tiny misalignments affect quality.
Load Vinyl on Mat-Based Cutters

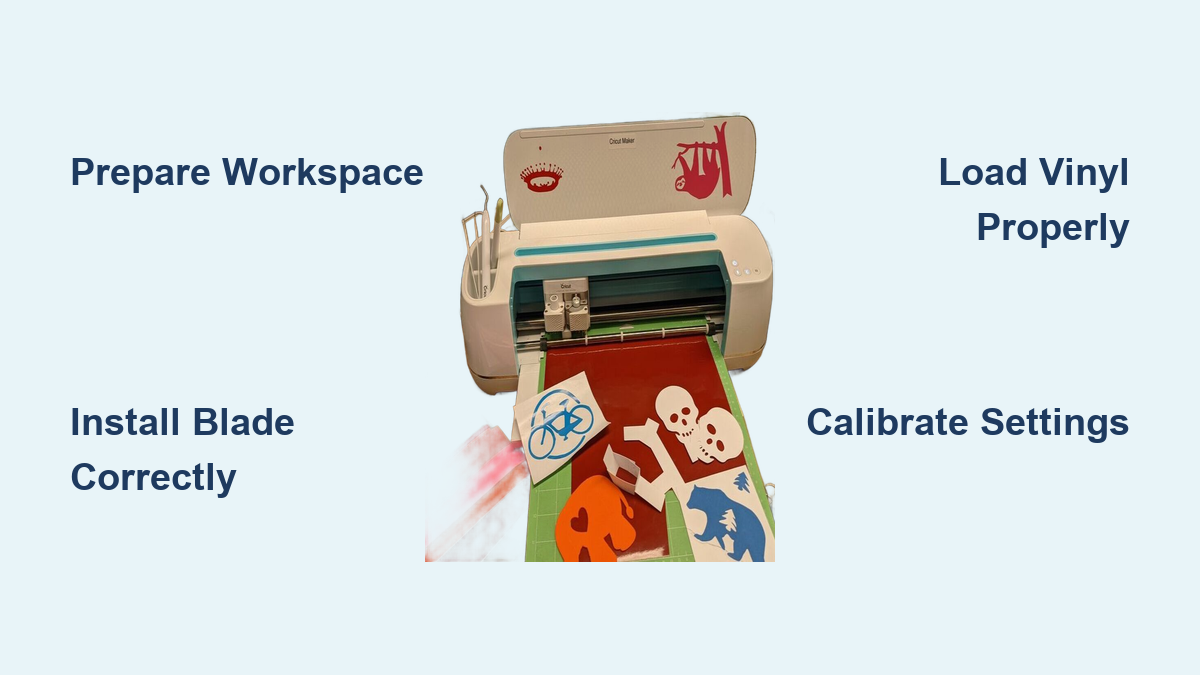
Desktop machines like the Silhouette Cameo and Cricut use sticky cutting mats to hold vinyl in place. Proper mat loading prevents slipping and skewed cuts.
Prepare the Cutting Mat
Clean your mat with a lint roller or masking tape if it’s dusty or losing tack. A dirty mat causes vinyl to shift mid-cut. Standard mats measure 12″ x 12″ and feature grid lines for accurate alignment.
Apply Vinyl to the Mat
- Peel back a corner of the vinyl’s backing liner
- Place the sticky side down onto the mat, aligning with grid lines
- Smooth from the center outward using a squeegee
- Press firmly to eliminate air bubbles and ensure full adhesion
Insert the Mat into the Machine
Slide the mat into the rollers until it clicks or locks. Make sure it sits straight. A tilted mat produces skewed designs. The mat should sit flush against the machine’s guides. If it wobbles, reseat it.
Load Vinyl on Roll-Fed Cutters
Professional plotters like Graphtec and Roland models feed vinyl directly from a roll. Correct loading prevents jams and tension issues.
Unroll and Straighten the Material
Pull several inches of vinyl from the roll. Flatten any curls by gently stretching the ends or placing small weights on them. Curled vinyl feeds unevenly and causes miscuts.
Feed Vinyl Under the Rollers
- Lift the pinch rollers (manual models) or press the load button
- Guide the vinyl under the rollers and over the cutting strip
- Align the edge with the machine’s ruler marks
- Lower the pinch rollers to grip the material
- Pull the tail gently to remove slack, but avoid stretching
Let excess vinyl hang freely off the back. A roller stand prevents tension problems on long jobs. Never over-tighten, as this warps the material and causes jams.
Connect Your Cutter to Design Software
Your cutter needs software to translate designs into cutting commands. Without a proper connection, the machine sits idle.
Install Drivers and Cutting Software
Most cutters ship with proprietary software:
• Silhouette Studio for Silhouette machines
• Graphtec Pro Studio or SignCut for Graphtec systems
• VEVOR Cutter Software for budget models
Download the correct version from the manufacturer’s website. Install drivers so your computer recognizes the device via USB. Some professional software like Flexi works only on Windows. Mac users often need SignCut or Silhouette Studio instead.
Establish a Working Connection
- Turn on the cutter
- Open your software and navigate to Machine or Device settings
- Select the correct COM port (Windows) or USB interface (Mac)
- Confirm the status shows “Online” or “Connected”
If connection fails, try a different USB cable. Some charging cables don’t support data transfer. Restart both computer and machine, then reinstall drivers if needed.
Import and Prepare Your Vector Design
Vinyl cutters require vector paths, not pixel images. Sending the wrong file type results in errors or blank cuts.
Convert Files to Vector Format
Acceptable vector formats include SVG, DXF, AI, EPS, and PDF. Raster files (JPG, PNG) must be converted before cutting:
• Use Inkscape (free) for manual tracing
• Use Adobe Illustrator or CorelDRAW for professional work
• Use Vector Magic for automatic conversion
Clean up jagged edges and simplify complex outlines after conversion.
Arrange and Mirror Designs Correctly
Import your vector file or draw directly using shape and text tools. Mirror the design only when cutting HTV (heat-transfer vinyl), since it flips during application. Scale the artwork to fit your material size.
Add a weeding box (a rectangle around your design) to help separate small pieces during cleanup. Position the design within the virtual cutting area and duplicate for batch cutting.
Calibrate Blade Depth and Pressure

Calibration is the most critical step in learning how to set up a vinyl cutter. Get this wrong, and you’ll waste material on every job.
Run a Test Cut
- Create a small test shape (a 1-inch square or short text works well)
- Set initial cutting pressure to medium (around 15 to 20 on a 0 to 50 scale)
- Send the test cut to the machine
Evaluate and Adjust Settings
After cutting, weed a corner of the test piece and check the results:
• Good cut: Vinyl lifts cleanly and the backing liner stays intact with a slight crease
• Too shallow: Vinyl doesn’t separate. Increase pressure or blade depth
• Too deep: Backing liner is cut or torn. Reduce pressure or retract the blade
Adjust pressure in increments of 2 to 3 until cuts are clean. Record successful settings for each vinyl type, such as “Oracal 651: Pressure 22, Depth 2mm.” Always test on a fresh section of vinyl between adjustments.
Weed and Apply Transfer Tape
Once your design is cut, you need to remove excess vinyl and prepare it for application.
Remove Excess Vinyl
Unload your material carefully. For mat-based machines, eject the mat and peel the vinyl sheet off slowly. For roll-fed models, use the advance button to move the cut section forward, then trim with rolling scissors.
Use a weeding tool (hook or pick) to remove unwanted vinyl:
1. Start with large negative spaces
2. Work from the center outward
3. Use tweezers for tiny details like dots in letters “i” or “j”
Place weeded vinyl on a lightbox or bright surface to spot small pieces easily.
Apply Transfer Tape and Position
Choose transfer tape based on your project:
• Standard (medium tack): Works for most vinyl
• Low-tack: Best for delicate surfaces
• High-tack: Needed for textured or outdoor applications
Lay the tape over the weeded vinyl and rub firmly with a felt-edged squeegee. Peel back slowly at a 45-degree angle. The design should lift cleanly from the backing liner.
Clean your target surface with rubbing alcohol and let it dry. Use the dry method for small decals or the wet method (soapy water or application spray) for large graphics that need repositioning.
Troubleshoot Common Setup Issues
Even with careful setup, problems arise. Knowing the fixes keeps your projects on track.
Fix Connection and Cutting Problems
| Issue | Likely Cause | Solution |
|---|---|---|
| Incomplete cuts | Dull blade or low pressure | Replace blade, increase pressure |
| Backing liner cut | Blade too deep | Retract blade, reduce pressure |
| Material slips | Dirty or loose rollers | Clean rollers, re-feed material |
| Design misaligned | Skewed mat or software error | Reinsert mat straight, recalibrate |
| No communication | USB cable issue | Try new cable, reinstall drivers |
Maintain Your Cutter for Long-Term Use
Wipe down rollers and the cutting strip after each session. Remove vinyl scraps and dust from the carriage area. Store blades in a protective case to prevent damage. Keep spare blades on hand since they wear out faster than you expect.
Frequently Asked Questions About Setting Up a Vinyl Cutter
What software do I need to set up a vinyl cutter?
Most vinyl cutters come with proprietary software like Silhouette Studio, Graphtec Pro Studio, or SignCut. You can also use third-party programs such as Flexi or free tools like Inkscape. Always verify OS compatibility before installing, since some software like Flexi has limited Mac support.
How do I know which blade to use for different materials?
Standard blades work for most adhesive vinyl, HTV, and cardstock. Use deep-cut blades for thicker materials like reflective vinyl or layered designs. Ratchet blades offer adjustable depth for fine control across multiple material types.
Why does my vinyl cutter skip or drag during cutting?
Skipping or dragging usually means a dull blade, incorrect pressure, or a loose blade holder. Replace the blade, increase pressure in small increments, and make sure the retention screw is tight. A test cut confirms the fix.
Do I need a cutting mat for all vinyl cutters?
No. Mat-based desktop cutters like the Silhouette Cameo require adhesive mats to hold vinyl in place. Roll-fed professional plotters feed material directly from a roll without mats. Choose your machine type based on your project volume and material preferences.
How often should I calibrate my vinyl cutter?
Calibrate every time you switch vinyl brands, colors, or types. Thickness and coating vary between rolls, so settings that work for one product may fail on another. A quick test cut before each new job prevents wasted material.
Can I cut images from the internet with my vinyl cutter?
Only if you convert them to vector format first. Vinyl cutters require vector paths (SVG, AI, EPS, DXF), not raster images (JPG, PNG). Use Inkscape, Adobe Illustrator, or Vector Magic to trace and clean up images before cutting.
Key Takeaways for Setting Up a Vinyl Cutter Successfully
Setting up a vinyl cutter comes down to three essentials: proper workspace preparation, correct blade and material loading, and accurate calibration. Always run a test cut before committing to a full design, and record your pressure and depth settings for each vinyl brand you use.
Keep spare blades, clean your machine regularly, and store vinyl rolls upright in a cool, dark place. With these habits in place, you’ll produce clean, professional cuts on every project. Now that your cutter is dialed in, load your favorite design and start creating.