How to Fix Laser Light Issues | Repair Guide
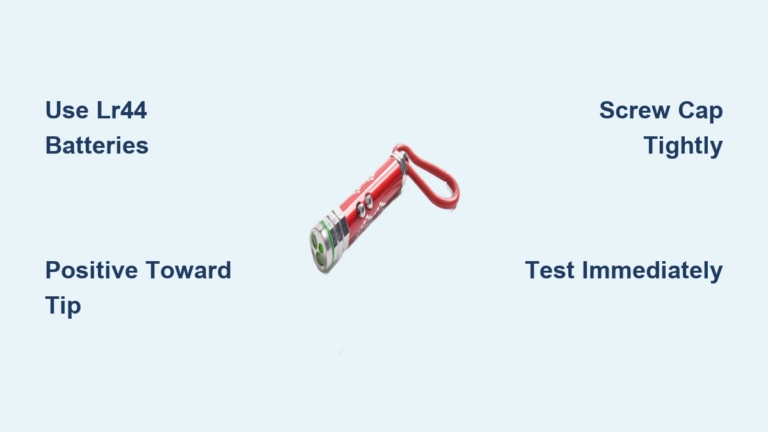
A flickering or dead laser light can disrupt presentations, construction work, or stage shows. Whether it’s a red pointer, green laser level, or DJ projector, most failures stem from simple issues like dead batteries, corroded contacts, or a worn-out diode. The good news? You don’t need advanced electronics skills to fix it. This guide shows you how to repair laser light devices step by step, from basic diagnostics to diode replacement.
You’ll learn exactly what tools you need, how to safely open the housing, and which components to check. Every section provides actionable steps so you can restore your laser and get back to work.
Check Battery Power First
Most laser lights fail because of weak or dead batteries. Before opening the device, rule out this simple cause.
Test Battery Voltage
Most laser lights run on 3 V from two 1.5 V cells. Use a multimeter set to DC voltage mode. Place the red probe on the positive terminal and black on negative. A healthy reading should be at least 2.8 V. Below 2.5 V means replace both batteries immediately.
Clean Battery Contacts
Look for white or green corrosion on metal terminals. Clean with 90% isopropyl alcohol and a cotton swab. For stubborn buildup, use a toothbrush. Dry completely before reinserting batteries.
Pro Tip: Always replace both batteries at once. Mixing old and new cells causes inconsistent power delivery and can damage the diode.
Tape the Button Before Opening
Many laser pointers have spring-loaded switches that can snap back violently when you open the housing. This causes internal damage and ruins the repair before it starts.
Wrap electrical or masking tape around the button housing. Press the button fully and fill the gap with tape to hold the spring in place. This takes 10 seconds and prevents the most common repair failure.
Open the Laser Housing Safely
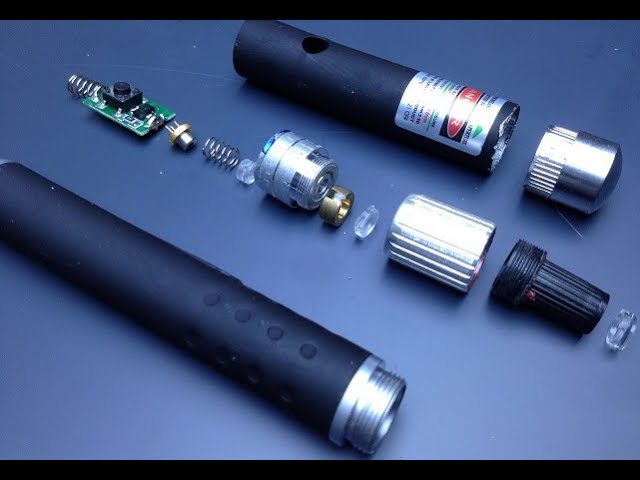
Casing designs vary. Some twist open, some snap shut, and some use adhesive.
Identify the Seam
Look for a thin line around the middle of the device. Apply gentle downward pressure on the button while rotating the top half counterclockwise. For snap-fit models, use a plastic pry tool along the seam and press lightly until one side pops open.
Handle Glued Units Carefully
If the housing won’t rotate or pry open, it may be glued. Use a hairdryer on low heat for 15 to 30 seconds to soften the adhesive. Insert a plastic tool and twist gently. Never force it.
Warning: Forcing the case can crack the housing or damage the circuit board inside.
Access Internal Components
With the case open, remove the batteries and foam spacer. The foam prevents short circuits between the circuit board and metal housing. Take a photo to remember the placement for reassembly.
You will now see the circuit board, laser diode, switch mechanism, and spring contact. Shine a flashlight inside to check for broken wires or visible damage.
Inspect and Test the Switch
The switch is a frequent failure point in laser lights.
Release the Spring Safely
Press and hold the button down. Use fine tweezers or a small chisel to push the spring outward from the left side. Let it release slowly. Never yank the spring.
Test Switch Continuity
Set your multimeter to continuity mode. Touch the probes to switch contacts and press the button. If it doesn’t beep, the switch is dead. Clean with alcohol or replace the switch.
Diagnose the Circuit Board
Look for cold solder joints, broken copper traces, corrosion, or burnt spots. Cold joints appear dull or cracked. Reflow joints with a fine-tip soldering iron, heating each for 2 to 3 seconds only. Bridge broken traces with a jumper wire or conductive silver pen.
Test Power at the Laser Diode

You cannot test a laser diode directly without a driver, but you can verify power delivery. Set the multimeter to DC voltage. Turn on the laser with batteries installed. Touch the probes to the diode’s solder points. If voltage reads near 3 V, power is reaching the diode. The diode itself may be dead.
Signs of a failed diode include no light despite power, a dim or scattered beam, or a burnt smell. Laser diodes are not LEDs. Replacement must match color, voltage, and current exactly.
Replace the Laser Diode
If testing confirms diode failure, replacement is the last step.
Desolder the Old Diode
Use a fine-tip soldering iron. Heat each lead until the solder melts. Use desoldering braid or a pump to remove excess solder. Gently lift the diode with tweezers.
Install the New Diode
Match the polarity carefully. The anode is the longer lead or marked terminal. The cathode is the shorter lead or flat side. Insert without bending the leads and solder quickly to avoid heat damage.
Replacement Specs: Red diodes need 650 nm at 2.8 to 3.0 V and 80 to 100 mA. Green diodes need 532 nm at 3.0 to 3.3 V and 100 to 150 mA. Blue diodes need 450 nm at 3.0 to 3.6 V and 120 to 150 mA.
Reassemble the Laser Light
Reverse the disassembly process step by step. Reinstall the button and spring in their original orientation. Ensure the spring presses firmly on the contact point. Replace the foam spacer around the switch to prevent shorting. Insert batteries with correct polarity. Align both housing halves and press firmly until they snap closed.
Final Check: Remove the tape from the button after the housing is secured.
Test the Repaired Laser
Power on the device and observe the beam. A successful repair shows a steady beam with full brightness and correct color. There should be no overheating within 15 seconds. If there’s no light, recheck battery polarity and switch continuity. If it flickers, inspect solder joints and foam insulation.
Keep Your Laser Light Working Longer
Prevent future failures with simple maintenance habits. Clean battery contacts every 3 to 6 months. Remove batteries when storing the device for extended periods. Store in a dry, cool place. Avoid leaving the laser on for more than 30 seconds continuously, as heat shortens diode lifespan. Always replace both batteries at once with matched cells.
Critical Safety Precautions
Laser repair involves real risks. Protect yourself and the device.
Eye Protection
Never look directly into the beam. Avoid pointing at reflective surfaces. Even low-power lasers can damage retinas. Wear safety glasses rated for your laser wavelength when testing.
Prevent Electrostatic Damage
Laser diodes are ESD-sensitive. Wear an anti-static wrist strap when handling them. Work on a non-conductive surface.
Solder Safely
Work in a well-ventilated area. Avoid inhaling fumes. Keep flammable materials away from your work area.
Tools Required for Laser Light Repair
Gather these tools before starting your repair. A multimeter tests voltage and continuity. A fine-tip soldering iron handles joints and diode replacement. Isopropyl alcohol cleans contacts. Cotton swabs apply cleaner to small areas. Plastic pry tools open casing safely. Fine tweezers handle small components. Electrical tape secures the button during disassembly. An anti-static wrist strap prevents ESD damage. A replacement diode matches your specific specs.
When to Stop and Seek Professional Help
Not every laser is worth repairing yourself. Replace instead of repair if the housing is cracked beyond sealing, the circuit board is severely burned, the diode fails repeatedly after correct replacement, or the device is still under warranty. Contact the manufacturer first. Some offer free repair for branded models.
Key Takeaways for Repairing Laser Light

- Always test batteries first and replace if below 2.8 V. Tape the button before opening to prevent internal recoil. Open the casing gently using rotation or prying, never force. Clean corroded contacts with isopropyl alcohol. Test switch continuity with a multimeter. Inspect the circuit board for cold joints and broken traces. Verify power reaches the diode before assuming it failed. Replace the diode only with matching specs. Reassemble with foam insulation in place. Test for a steady, bright beam after repair.
Repairing a laser light is methodical, not magical. By following these steps, you can fix most non-working units in under 30 minutes. Start simple: power first, then switch, then diode. With the right tools and safety habits, you’ll restore your laser and extend its life for years.
Frequently Asked Questions About Laser Light Repair
Why does my laser pointer not turn on even with new batteries?
The issue could be corroded battery contacts, a faulty switch, cold solder joints on the circuit board, or a failed laser diode. Test each component systematically, starting with battery contact cleaning.
Can I replace the laser diode with any color?
No. Laser diodes must match in wavelength, voltage, and current. Red needs 650 nm at 2.8 to 3.0 V, green needs 532 nm at 3.0 to 3.3 V, and blue needs 450 nm at 3.0 to 3.6 V. Using the wrong diode damages the circuit.
How do I know if the laser diode is burned out?
Signs include no light output despite confirmed power delivery, a dim or scattered beam, or a burnt smell. If the multimeter shows voltage reaching the diode but no light appears, the diode is likely failed.
Is it safe to repair a laser light myself?
Yes, with proper precautions. Wear eye protection, use an anti-static wrist strap, and work in a ventilated area. Never look directly into the beam during testing.
How long does a laser diode last?
Most laser diodes last 5,000 to 10,000 hours with proper use. Avoid leaving the laser on for more than 30 seconds continuously to prevent overheating and extend lifespan.