How to Modify a Laser: Safety & Steps
Laser modification isn’t just for experts. Hobbyists and tinkerers can transform a weak 5 mW pointer into a 1,000+ mW burning tool with the right knowledge. But this power comes with serious risks: permanent eye damage, fire hazards, and legal limits kick in above 5 mW. This guide walks you through every step from simple pot tweaks to full diode swaps using verified technical data. You will learn how to safely overdrive, replace drivers, or build a high-power laser from scratch, all while avoiding common pitfalls like thermal runaway and ESD damage.
Decode Your Laser Modification Goals
Increase Output Beyond 5 mW
Stock laser pointers are capped at 5 mW (Class 3R) for safety, but most are under-driven. Modifications unlock hidden power, often reaching 100 mW to 1.4 W, pushing them into Class 4 territory capable of burning, cutting, and scientific experiments. The goal is not just brightness. It is usable intensity for focused applications where a weak beam simply will not do the job.
Enable Burning and Ignition
A modified laser can pop balloons, light matches, and cut dark plastics. Success depends on wavelength absorption. Blue 405 nm lasers excel here due to shorter wavelength and tighter focus. Green 532 nm also performs well, especially with high-power diodes like the Nichia NDG7475 which puts out an incredible 1.4 W at 2.3 A.
Support Advanced Optical Experiments
High-power, single-mode beams enable optical trapping, fluorescence excitation, and phosphorescence erasure. For example, a red laser flash can deplete trapped electrons in glow-in-the-dark materials, causing instant fade. These uses demand stable, focused output achievable only through proper driver and diode upgrades.
Prioritize Laser Safety First
Wear Proper Laser Goggles
Laser protective eyewear is non-negotiable for any mod above 5 mW. Choose goggles rated for your laser wavelength (OD4+ for 405-532 nm). Without them, even a microsecond reflection can cause irreversible retinal damage. This is not optional gear. It is your last line of defense against permanent blindness.
Prevent Invisible IR Exposure
Many green DPSS lasers emit invisible 808 nm and 1064 nm IR alongside visible green. Since your blink reflex does not trigger, IR can silently burn your retina. Use IR detection cards or filters to confirm beam presence during testing. Never assume the visible beam is the only hazard.
Ground Your Workstation
Work on an ESD-safe mat connected to ground. Laser diodes are highly sensitive to static. Touching one without grounding can instantly kill it. Wear a wrist strap and use a current-limiting resistor between you and ground for extra protection during testing phases.
Avoid Legal and Public Hazards
Lasers above 5 mW are Class 3B or Class 4 and regulated in many countries. Never point them at aircraft, vehicles, or people. Modified lasers may violate consumer safety laws if sold or used irresponsibly. Use only in controlled, private environments away from bystanders.
Choose the Right Laser Type

Red: DVD-Burner Diodes
Harvest 650 nm red diodes from old DVD burners. They are cheap, widely available, and offer excellent single-mode beam quality. Ideal for keychain builds and optical experiments. Pair with a 10180 battery and AMC7135 driver for stable output that lasts.
Green: DPSS vs. Direct Diode
Most green lasers use DPSS (Diode-Pumped Solid-State). An 808 nm IR diode pumps a crystal to emit 532 nm green. These are inefficient and temperature-sensitive. Better options are direct green diodes like the Nichia NDG7475, which deliver 1.4 W (1400 mW) at 2.3 A. No crystals, no alignment. Just pure, stable green light.
Blue: 405 nm Blu-Ray Diodes
405 nm violet-blue diodes from Blu-ray burners are top performers for burning. Shorter wavelength means higher power density at focus. Use a Spirit boost driver to push them past 1 W. They also work great for UV-reactive materials and fluorescence experiments.
Infrared: Hidden Danger, High Risk
IR diodes (780-810 nm) are invisible but pack serious power. Found in DVD burners, they require IR viewers or cards for alignment. Never operate without detection tools. You will not see the beam, but it can blind you just as easily as visible light.
Adjust Potentiometer for Quick Overdrive
Access the Adjustment Screw
Some green lasers (Leadlight, Changchun models) have a potentiometer under the power button. Carefully pry off the button with a small screwdriver. Look for a tiny screw. This controls current to the diode. Reinstall the button loosely so you can press it while adjusting.
Turn Clockwise to Boost Power
With batteries installed, press the button and slowly turn the pot clockwise using a 1 mm screwdriver. Watch for increased brightness. Stop when output peaks or the laser cuts out. Over-tightening can kill the diode. Reassemble and test carefully.
Know the Limitations
Not all lasers respond to this method. Some high-spec 27.7 mW units are already maxed at factory settings. Without current regulation, thermal runaway is likely. This mod is temporary. Expect shortened diode life. Best for quick tests, not permanent builds.
Replace Stock Driver for Stability

Use AMC7135 for Regulated Current
Most stock lasers use a resistor-only driver, which is unstable and inefficient. Replace it with an AMC7135 IC that delivers 350 mA constant current. For more power, wire multiple AMC7135 chips in parallel. Four chips gives you 1.4 A of regulated current.
Install MOSFET for High-Current Switching
The original switch cannot handle high loads. Use a MOSFET (rated 620 A) as the main power switch. Connect the original switch to the gate. It becomes a low-current trigger. This protects the button and enables safe high-power operation.
Add Capacitor and Heat Sink
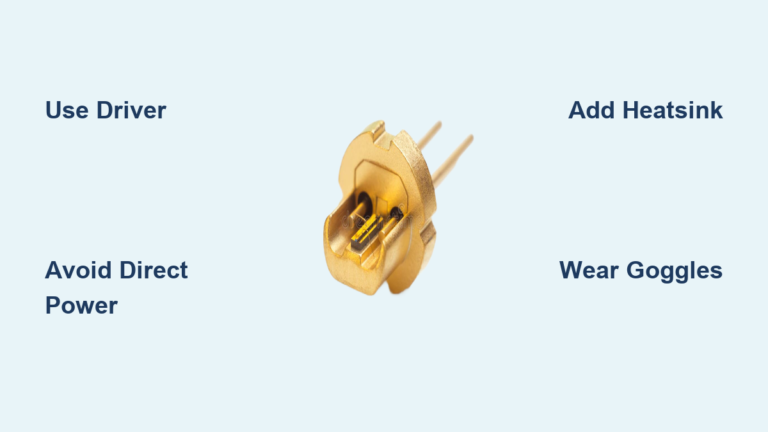
Install a filter capacitor across the power line to reduce ripple and stabilize output. Mount the driver and diode on aluminum or copper heatsinks. A laser diode sandwich (two metal blocks) improves thermal management dramatically. Run in 30-second duty cycles to avoid overheating.
Upgrade Power Source and Battery
Use 10440 or 10180 Li-Ion Cells
Replace weak AAA or CR2032 batteries with 10440 (3.7 V, 300-400 mAh) or 10180 (smaller, high-drain) lithium cells. They deliver higher voltage and current than alkalines. Never use unregulated power. Always pair with a proper driver.
Test with Supercapacitors for Peak Power
For short bursts over 3 W, use supercapacitors in series. Their Equivalent Series Resistance (ESR) acts as a natural current limiter. Ideal for testing diode limits without frying them. Not for continuous use since capacitors drain fast.
Avoid Dead-on-Arrival Units
Many eBay lasers emit less than 1 mW despite claims. Test with a power meter or match test. If dead, bypass the driver and power the diode directly (with current limit) to diagnose. Often the diode is fine. The driver failed.
Swap Diode for Maximum Output
Disassemble the Host Safely
For press-fit cases, use a vise with padded jaws to gently separate the housing. Remove the stock module. Avoid prying with metal tools. Scratches can create reflection points. Always remove batteries first before any disassembly.
Install High-Power Diode
For green, fit the Nichia NDG7475 in a TO-18 can. For blue, use a 405 nm Blu-ray diode. Solder leads carefully. Excessive heat kills diodes. Mount in a heatsink module with thermal paste for efficient cooling.
Collimate the Beam Correctly
Use an adjustable lens (G-2 lens works well) to focus the beam. Position it so the dot is smallest at distance. For burning, focus to a pinpoint on the target surface. Misalignment causes divergence and power loss.
Test Output Accurately
Perform Match and Balloon Tests
Blacken a match head with soot. Aim the laser. Ignition in seconds means over 100 mW. For balloons, coat with marker ink. A black balloon pops instantly under high power. These are quick visual confirmations of burning capability.
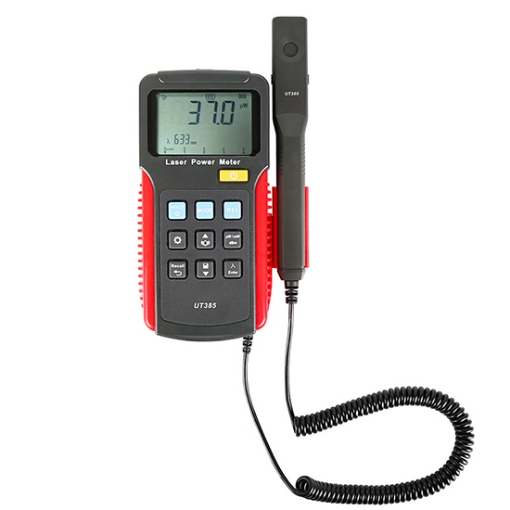
Measure with a Power Meter
For accuracy, use a laser power meter. Without one, compare brightness to a known 27.7 mW unit. Remember that 1.4 W equals 1400 mW, roughly 800 lumens, as bright as a small flashlight.
Check Focus and Power Density
A single-mode diode can focus to a spot 1/100th the width of a human hair. At this point, power density exceeds 10,000 times solar irradiance. Theoretically this can heat materials to roughly 60,000 K, hotter than the sun surface.
Optimize for Longevity and Duty Cycle
Limit On-Time to Prevent Overheating
Even with heatsinks, duty cycles of 30 seconds on and 30 seconds off are recommended. Diodes degrade fast above 50°C. Use a thermal pad or IR thermometer to monitor temperature during extended use.
Use Rechargeable Batteries
High-power builds drain batteries in minutes. Rechargeable 10440 or 10180 cells save cost and ensure consistent voltage. Avoid cheap knockoffs. They can overheat or explode under high-drain conditions.
Secure Solder Joints and Wiring
Vibration and heat stress can crack solder joints. Use heat-shrink tubing and secure wires with epoxy. Avoid bending diode leads. Mechanical stress leads to early failure.
Explore Advanced Applications
Build an Optical Trap
A tightly focused, high-intensity beam can manipulate microscopic particles using radiation pressure. Requires single-mode, stable output and precision optics. Used in biophysics to study cell movement and behavior.
Excite Fluorescent Dyes
High-power green lasers (532 nm) excite dyes like 2,7-dichlorofluorescein, causing visible glow. At extreme flux, the sample can audibly boil. This is a dramatic demonstration of energy transfer from the laser to the material.
Erase Phosphorescence Instantly
Flash a red laser after a camera flash to deplete trapped electrons in phosphorescent materials. The glow disappears in milliseconds. This demonstrates quantum-level electron transitions in a dramatic, visible way.
Follow Final Build Checklist
Confirm Safety Measures
Before powering up, verify these critical items are in place. Laser goggles must be on. Work area must be clear of reflective surfaces. Workspace must be properly grounded. Fire extinguisher should be nearby. Every item must be checked off before testing.
Verify Circuit Connections
Double-check all electrical connections before power-up. Driver must be set to correct current. MOSFET gate must be connected to the switch properly. Capacitor must be installed with correct polarity. Diode polarity must be correct with cathode connected to ground.
Test Before Full Power
Use a 10 ohm, 5 W resistor as a dummy load to test driver output before connecting the diode. Measure voltage drop and calculate current with Ohm Law (I = V/R). This is far safer than frying a 20 dollar diode on your first try.
Frequently Asked Questions About Laser Modification
Is it legal to modify a laser pointer?
Modifying a laser pointer is legal for personal use in most areas, but lasers above 5 mW become Class 3B or Class 4 devices that may be restricted. Never point modified lasers at aircraft, vehicles, or people. Know your local laws before building.
What is the easiest way to increase laser power?
The simplest method is adjusting the potentiometer on green DPSS lasers that have an accessible adjustment screw under the power button. Turn clockwise slowly to increase current. This can boost output from 5 mW to 100+ mW, but offers no thermal protection.
Which laser color is best for burning?
Blue 405 nm Blu-ray diodes are generally best for burning because shorter wavelengths focus tighter and are absorbed more efficiently by dark materials. The Nichia NDG7475 green diode at 1.4 W is also excellent.
How do I prevent damaging my laser diode?
Use current-regulated drivers like the AMC7135 instead of resistor-only setups. Add heatsinking and limit duty cycles to 30 seconds on and off. Always use a current-limiting resistor or dummy load when testing circuits.
Can I use a modified laser for scientific experiments?
Yes, high-power single-mode lasers enable optical trapping, fluorescence excitation, and phosphorescence erasure experiments. These require stable output and proper focusing optics to work effectively.
Key Takeaways for Modifying Your Laser
Laser modification ranges from simple potentiometer tweaks to complete diode swaps. Start with the easiest method (pot adjustment) before attempting complex driver replacements. Always prioritize safety with proper goggles, grounded workspaces, and IR detection for green lasers.
Power gains can be dramatic, from 5 mW up to 1.4 W (1400 mW), but so are the risks. Thermal management, current regulation, and proper testing are essential for longevity. Use the checklist before every build, test with dummy loads first, and never underestimate the beam.
Modifying lasers voids safety certifications and carries legal responsibilities. Use this knowledge for education, experimentation, and responsible exploration only. Build smart, test safe, and respect the power you are working with.