How to Use a Bosch Laser Measure: Quick Guide
You’re standing in a large room, tape measure in hand, trying to calculate square footage for new flooring, only to realize you’re a few inches short on every stretch. Now imagine getting that same measurement in seconds, from across the room, with pinpoint accuracy. That’s the power of a Bosch laser measure.
These compact digital tools replace outdated tapes and wheels, offering fast, accurate distance readings up to 400 feet with precision as tight as ±1/16 inch. In this guide, you’ll learn step-by-step operation, advanced functions like area and volume calculation, Bluetooth integration, and pro tips to get the most from your device.
Power On and Activate Your Bosch Laser Measure
Turn On the Device
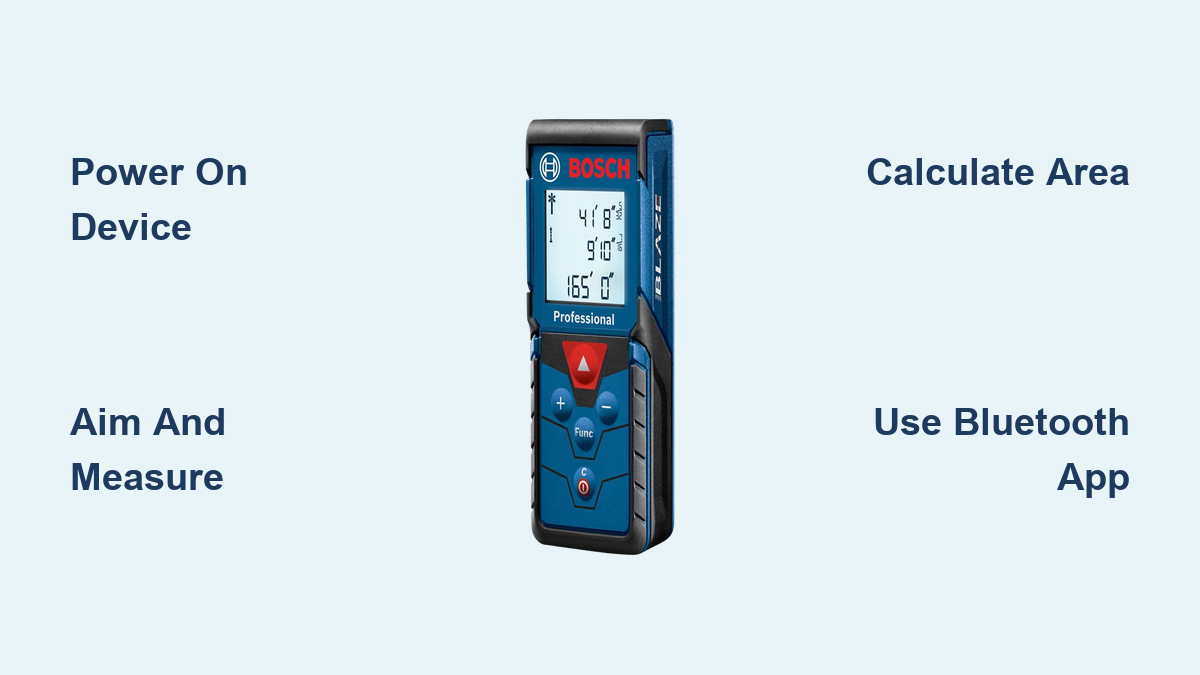
To start using your Bosch laser measure, locate the red measurement button which often doubles as the power button. Press and hold it for 1 to 2 seconds until the display lights up. The laser typically activates immediately on most models, projecting a visible red or green dot onto your target surface.
If nothing happens, check battery status. A blank screen may indicate dead or improperly installed batteries. Most compact models like the GLM35 use AAA alkaline batteries, while premium versions like the GLM400CL have rechargeable 3.7V lithium-ion batteries.
Enable Real-Time Measurement Mode
Once powered, the device enters real-time mode by default on many models. As you pan the tool across a wall or ceiling, the distance updates dynamically in milliseconds. This mode is ideal for scanning large spaces to find maximum or minimum distances, such as locating the farthest wall points in a room.
Use this mode to quickly assess room dimensions before locking in final measurements. The continuous updates help you identify the exact boundaries of a space without taking multiple manual readings.
Take a Single Distance Measurement
Aim and Measure
To capture a precise distance, hold the device steady against a fixed point such as a wall edge or floor. Aim the laser dot at the target surface, ensuring it is perpendicular to the target for best accuracy. Press the red measurement button once, and the reading locks instantly on the display.
For long distances or bright sunlight, use models with green lasers like the GLM400CL, which are up to 4 times more visible than red lasers. Look for a solid, centered dot on the target surface. A blurry or split beam may indicate an uneven surface or poor alignment.
Check Battery and Display
While measuring, watch the battery icon in the corner of the screen. Low power can affect accuracy and responsiveness. Replace or recharge batteries before critical jobs, especially during outdoor work in cold weather, which reduces battery life significantly.
Store and Recall Measurements
Save Readings to Memory
Most Bosch laser measures let you store previous measurements for later reference. On the GLM35, press the red button again after taking a reading to save it. The display shows M1 or M2 to indicate stored values, and you can store up to two measurements simultaneously.
Higher-end models like the GLM400C and GLM165-27CGL support expanded memory, storing dozens of readings organized by project. Use stored values for comparing room lengths or verifying symmetry in framing projects.
Retrieve or Delete Stored Data
To manage saved data, press the C button to delete the current value. Repeated presses remove stored entries step-by-step. Holding the C button usually powers off the device, allowing selective clearing without restarting the entire session.
A common mistake is accidentally holding the C button too long, which shuts down the tool and loses unsaved data. Tap lightly for deletion.
Calculate Area Automatically
Measure Room Square Footage
Need to estimate flooring or paint quantities? Use the area function. Press the red button to measure length, then press the AREA button or red button again depending on your model. Measure width, and the device displays total area automatically.
This function is perfect for tile installers, carpet layers, or real estate agents listing property square footage. No math is required since the tool multiplies length by width instantly.
Avoid Common Errors
For accurate area results, ensure both measurements are taken at right angles. Measure from consistent reference points such as inside wall to inside wall. Avoid aiming at uneven or angled surfaces, which can skew results.
If the display shows Err or —, reposition and try again. These error codes typically indicate an invalid measurement that needs to be retaken.
Compute Volume in Cubic Feet
Estimate Material Needs
To calculate volume for concrete, mulch, or storage needs, press the top triangle button three times on models like the GLM35 to enter cubic mode. Measure length, then width, then height. The device computes and displays volume automatically.
This is invaluable for landscapers ordering gravel or contractors pouring footings. For example, measuring a 10 by 8 foot patio at 6 inches deep equals 40 cubic feet of material needed.
Confirm Unit Settings
Before calculating, verify the unit is set to cubic feet or cubic meters. Switch via Function plus plus or minus buttons if needed. Using incorrect units leads to costly over or under-ordering of materials.
Add and Subtract Measurements
Sum Multiple Distances
To total several runs for wall trim, wiring, or piping, take the first measurement and press the plus button. Take the next measurement and press plus again. Continue adding, and the final press gives the cumulative sum.
This is useful for measuring perimeters of irregular rooms or total conduit length across multiple sections.
Subtract Openings from Area
To deduct windows or doors from wall coverage, measure the full wall area and press the minus button. Measure the opening size, and the result shows net usable area. Painters use this to estimate exact gallon requirements, avoiding waste.
Misuse of plus and minus buttons can lead to negative values. Reset with the C button if needed.
Measure Height with Triangle Mode
Calculate Vertical Height Without Ladders
Need to know ceiling height but have no ladder? Use Pythagorean or triangle mode. Stand at the base of the wall and point the laser at the ceiling corner. The device uses trigonometry to compute vertical height based on angle and distance.
This applies the Pythagorean theorem using internal sensors. This function is essential for HVAC duct planning, installing ceiling fans, and surveying roof peaks or tall trees. Use on stable ground and ensure the device is level for accurate results.
Switch Between Units
Change from Feet to Meters
To switch measurement units, hold the Function button and press plus or minus to scroll through options. Available units include feet and inches, decimal feet, meters, centimeters, and inches. Release when the desired unit appears.
The selected unit remains active until changed, even after power-off, so you do not reset every time. Set to decimal feet for easier math in construction estimating, such as 12.5 feet instead of 12 feet 6 inches.
Toggle Sound Feedback On and Off
Enable Beep Confirmation
To turn sound on or off, hold the Function button and press plus to enable or minus to disable beeps. Audible feedback helps when working in noisy environments, when you cannot see the screen such as overhead measurements, or when confirming capture without looking.
Turn off beeps in client meetings or quiet zones like offices or homes. Sound settings are saved automatically.
Use Bluetooth and MeasureOn App

Sync with Smartphone
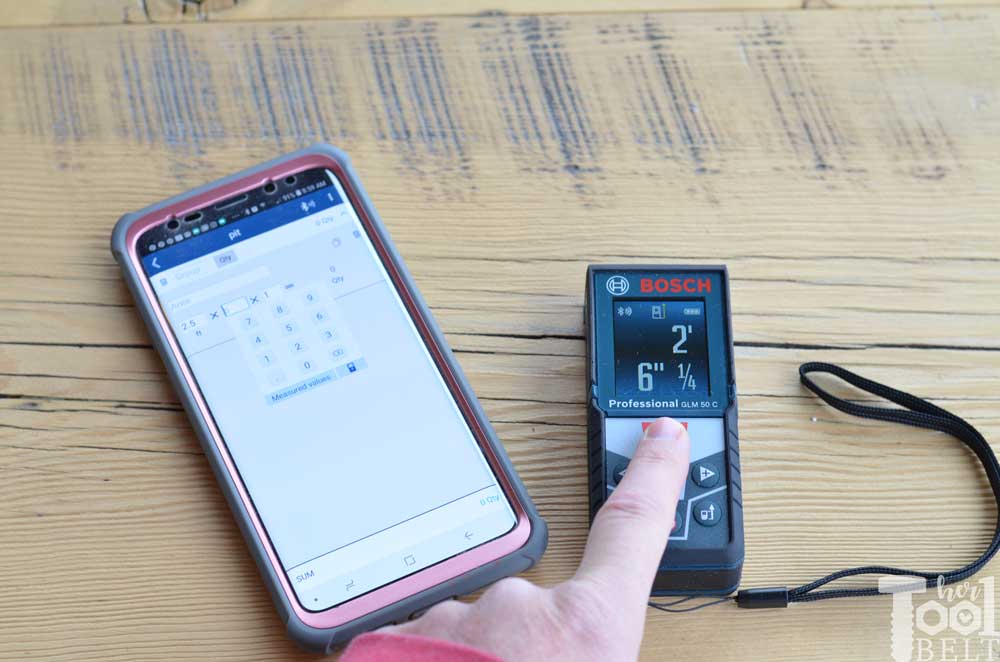
On compatible models like the GLM400C, GLM400CL, and GLM165-27CGL, enable Bluetooth on your phone and open the free Bosch MeasureOn app. Pair the device via the app menu.
Once connected, transfer measurements wirelessly, annotate photos with overlaid dimensions, create digital floor plans, and export reports for clients or contractors. Snap a photo of a room, add live measurements, and send a PDF quote within minutes.
Optimize Workflow Efficiency
Benefits of app integration include eliminating manual note-taking errors, sharing data instantly with team members, organizing projects by name date or location, and reusing templates for recurring jobs. Keep firmware updated through the app for best performance.
Maintain Accuracy in Tough Conditions
Work in Dust and Rain
Bosch laser measures are built tough with IP54 to IP65 ratings, meaning resistance to dust, splashes, and even water jets. Rubber overmolds absorb shock from drops. The devices operate in temperatures from 14°F to 122°F.
Still, protect your investment by wiping clean after use in muddy or wet conditions. Avoid submerging these tools since they are splash-resistant but not waterproof. Use gloves in cold weather since touchscreens may not respond well.
Improve Laser Visibility
For outdoor or bright indoor use, choose models with green lasers which are more visible in daylight. Use integrated camera viewfinders on high-end models to aim precisely over 100 feet. Attach to a tripod using the 1/4 inch thread for stability.
The camera advantage lets you see exactly where the laser hits via live feed on the color display, eliminating guesswork.
Choose the Right Model for Your Needs
Entry-Level: GLM35 and GLM100 Series
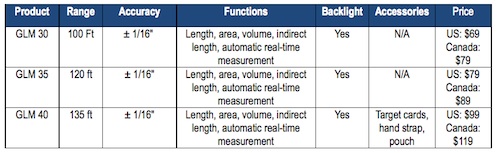
The GLM35 and GLM100 series are best for DIYers, realtors, electricians, and plumbers. These models offer a range of 165 feet for the GLM35 and 100 feet for the GLM100, red laser, basic area and volume calculations, addition and subtraction, IP54 rating, and AAA battery power.
The GLM35 is one of the most popular handhelds, compact, reliable, and priced under $100.
Pro-Grade: GLM400C and GLM400CL
The GLM400C and GLM400CL are best for contractors, architects, and surveyors. These models offer a range of 400 feet, green laser with 4 times visibility, color display with camera targeting, Bluetooth and MeasureOn app, rechargeable battery, and IP65 dust and water resistance.
The GLM400CL offers the fullest feature set, ideal for daily professional use.
Troubleshoot Common Issues
No Laser or Blank Screen
Possible causes include dead batteries, dirt on the lens, or device lock function. Replace or recharge batteries, clean the lens gently with a microfiber cloth, and check for lock function in the manual. Try power cycling by holding C to shut off, waiting 5 seconds, then restarting.
Inconsistent Readings
If numbers fluctuate, aim at solid non-reflective surfaces and avoid glass, mirrors, or dark matte finishes. Hold steady since shaking causes errors. Use a tripod mount for long-distance shots. Check for obstructions such as fog, dust, or rain.
Avoid measuring through screens, netting, or steam since the laser can scatter.
Bluetooth Pairing Fails
To fix connection issues, restart both device and phone, ensure firmware is updated, forget the device in phone settings then re-pair, and stay within 33 feet range. If the problem persists, reset the device via settings.
Maximize Longevity and Accuracy
Calibrate Regularly
While Bosch tools come factory-calibrated, perform a manual accuracy check monthly. Measure a known distance such as 10 feet taped on the floor. Compare to the laser reading. If off by more than 1/16 inch, recalibrate or contact support.
Do not attempt internal calibration. Send to an authorized service center if needed.
Store Properly
To extend life, keep the device in a protective case when not in use. Store in a cool, dry place. Remove batteries during long storage. Avoid leaving the device in hot vehicles.
Treat your laser measure like a smartphone by protecting the screen, avoiding drops, and cleaning regularly.
Frequently Asked Questions About Using a Bosch Laser Measure
How do I measure area with my Bosch laser measure?
Press the red button to measure the first dimension, then press the area button or red button again depending on your model. Measure the second dimension, and the device automatically calculates and displays the area in square feet or square meters.
Can I use my Bosch laser measure outdoors in bright sunlight?
Yes, but green laser models like the GLM400CL are recommended for outdoor use since they are up to 4 times more visible than red lasers. You can also use the integrated camera viewfinder on high-end models to aim precisely over long distances.
How do I switch between feet and meters on my Bosch laser measure?
Hold the Function button and press plus or minus to scroll through unit options including feet and inches, decimal feet, meters, centimeters, and inches. The selected unit remains active until changed.
Does the Bosch MeasureOn app work with all laser measure models?
Bluetooth connectivity and MeasureOn app compatibility are available on select models including the GLM400C, GLM400CL, and GLM165-27CGL. Check your model’s specifications to confirm app compatibility.
Why does my laser measure show inconsistent readings?
Inconsistent readings usually result from aiming at reflective surfaces, shaking while measuring, or obstructions in the laser path. Aim at solid non-reflective surfaces, hold the device steady, and use a tripod for long-distance measurements.
How do I calculate volume with my Bosch laser measure?
Press the top triangle button three times to enter cubic mode, then measure length, width, and height sequentially. The device automatically computes and displays the volume in cubic feet or cubic meters.
Key Takeaways for Using Your Bosch Laser Measure
Mastering how to use a Bosch laser measure transforms the way you work by making every project faster, smarter, and more accurate. From simple length checks to full digital floor plans with the MeasureOn app, these tools deliver professional results in seconds.
Always measure from the correct reference point since some models let you switch between front or back edge measurement. Use the delayed measurement function to reduce shake when pressing the button. For sloped ceilings or angled walls, use continuous measurement mode to scan and find peak values. Combine laser measuring with traditional tools when precision corners or moldings are involved.
Choose the right model for your needs, follow best practices, and maintain your device to ensure years of reliable service. Whether you choose the budget-friendly GLM35 or the professional-grade GLM400CL, proper usage and care will maximize your investment.