How to Make a Burning Laser: Safe DIY Guide
If you’ve ever wondered how to make a burning laser, you’re not alone. From igniting matches to cutting fabric and engraving wood, high-power lasers are fascinating DIY projects. This guide walks you through building a functional 300 mW to 1 watt+ burning laser, covering component selection, circuit design, focusing, thermal management, and critical safety protocols. By the end, you’ll understand not just how to build it, but how to do it safely and effectively.
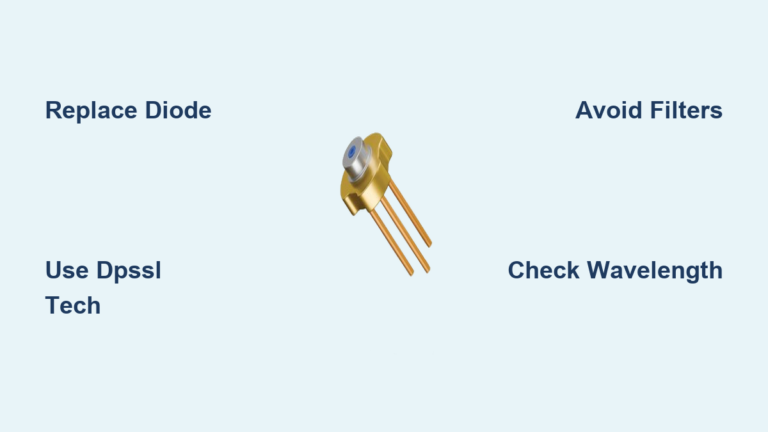
Select the Right Laser Diode for Burning
The laser diode is the core of your burning system. Choosing the correct one determines your device’s power, color, and material-burning capability.
Choose 445–450 nm Blue for Maximum Burn
Among all wavelengths, 445–450 nm blue laser diodes offer the best balance of power and affordability for burning applications. These diodes typically deliver 1 to 5 watts, making them ideal for melting plastic, charring wood, and cutting thin fabrics. They’re widely available and integrate easily into DIY builds.
Compare your options:
- 405 nm (violet): Moderate burn on dark surfaces, best from Blu-Ray drives
- 520 nm (green): Highly visible but low burn power, expensive
- 650 nm (red): Limited to black materials, weak output
Pro Tip: For real cutting ability, go with a 1W+ 445 nm diode. It’s the most effective and cost-efficient burning laser available.
Salvage or Buy a Diode
You can source a laser diode in two ways.
Buy New (Recommended)
* Purchase a 1W 445 nm diode in a 12 mm or 18 mm module online
* Price ranges from $20 to $40
* Comes pre-mounted with heat dissipation and lead wires
* Ensures known specifications and reliability
Salvage from Optical Drives
* Extract from Blu-Ray burners, not readers
* Reading diodes emit under 5 mW, useless for burning
* Burning diodes emit up to 500 mW at 405 nm
* Look for a small metal-can component on a movable rail
* Desolder carefully and keep protective casing intact
Warning: Never power a diode without a driver. Overcurrent destroys it instantly.
Install a Constant Current Driver to Protect the Diode

Laser diodes require current regulation, not voltage regulation. A driver prevents thermal runaway and ensures stable operation.
Use a Buck or Boost Driver Based on Voltage
Your driver must match your power source and diode requirements.
| Scenario | Driver Type | Example |
|---|---|---|
| Input exceeds diode voltage | Step-down (buck) | 9V to 5V conversion |
| Input below diode voltage | Step-up (boost) | 3.7V to 5V conversion |
Best Setup: Use a boost driver with a 3.7V 18650 battery for portable, high-output performance.
Set Safe Current Limits
Exceeding the diode’s rated current by even 10% can destroy it.
- A 1W 445 nm diode typically maxes out at 1.0 to 1.2A
- Some factory drivers default to 1.3A+, too high for longevity
- To cap current, solder a 3.3 ohm resistor across the driver output
- Always test output with a multimeter before connecting the diode
Safety Check: Power the driver into a dummy load first to verify current settings.
Power Your Laser with 18650 Batteries
Stable, high-capacity power is essential for consistent burning performance.
Why 18650 Batteries Are Ideal
- Voltage: 3.6 to 4.2V, perfect for boost drivers
- Capacity: Up to 3500 mAh
- Rechargeable and widely available
- Use protected cells with built-in overcharge and discharge protection
Avoid AA/AAA alkaline batteries. They have low capacity and voltage drops fast during use.
Recommended: Pair a protected 18650 with a battery holder and on/off switch for safe, portable operation.
Wire Battery to Driver Safely
- Connect positive (+) from battery to driver input (+)
- Connect negative (-) to driver input (-)
- Include a switch in series on the positive line
- Never solder directly to the battery
- Use heat shrink tubing on all connections
Critical: Double-check polarity. Reverse connection can fry the driver or diode.
Focus the Beam for Maximum Burning Power
A raw laser beam won’t burn. Only a tightly focused point achieves the energy density needed to ignite materials.
Use a Glass Adjustable Lens
- Glass lenses are preferred, more durable with less absorption
- Acrylic lenses degrade over time and lose about 5% power
- Choose a 5 mm diameter lens with threaded housing for fine adjustment
- Install the lens in front of the diode module, then adjust distance to narrow the beam
Find the Focal Point
- Point the laser at black paper or wood, high absorption materials
- Slowly turn the lens to change focus
- Look for the smallest visible dot, that’s the focal point
- At this point, the beam will smoke, char, or ignite the material
Pro Tip: The focused dot can reach thousands of degrees Celsius. Treat it like an open flame.
Manage Heat to Prevent Diode Failure
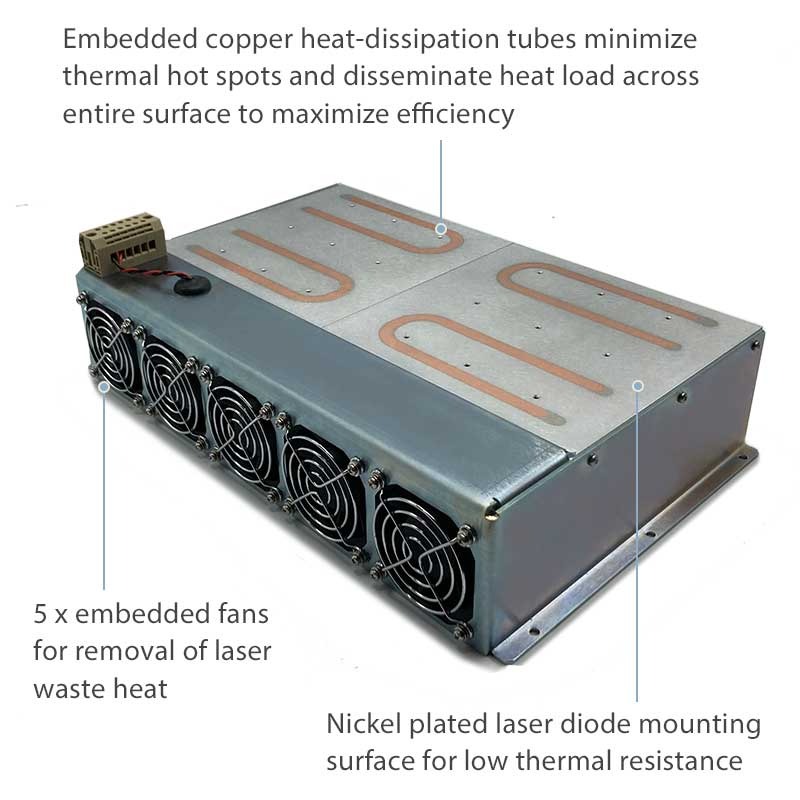
High-power diodes generate heat fast. Without cooling, they fail within seconds.
Attach a Heat Sink
- Use an aluminum heat sink mounted directly on the diode module
- Even a small one dramatically improves longevity
- Apply thermal paste between diode and sink for better conduction
- Add a small fan for active cooling during long-duration use
Limit Use to 30-Second Bursts
- On time: 10 to 30 seconds
- Off time: At least equal to on time
- Continuous use without cooling leads to output drop, diode degradation, and permanent failure
Verified: With proper cooling, diodes last 10,000+ hours of intermittent use.
Assemble the Complete System
Now bring all components together in a safe, functional build.
Step-by-Step Assembly
- Mount the diode in its module
- Solder diode leads to driver: Red to (+), Black to (-)
- Set current limit and test with multimeter
- Connect driver to 18650 battery via switch
- Install focusing lens and adjust
- Attach heat sink with thermal paste
- Double-check all connections for shorts
Final Check: Inspect for loose wires, correct polarity, and secure insulation.
Choose a Safe Enclosure
Common options include:
- Flashlight body: Fits 18 mm modules, most popular choice
- Altoids tin: Good for benchtop builds
- Bic lighter shell: Compact and stealthy
- PVC or metal tube: Customizable
Ensure the enclosure provides access to the focus ring, ventilation for heat, and no contact between metal case and exposed circuits.
Test Safely and Responsibly
First test is critical. Do it right.
Wear Laser Safety Goggles
- Mandatory for all testing
- Choose by wavelength: 445 nm blue needs OD4+ at 400-500 nm, 405 nm violet needs OD3+ at 400-450 nm, 650 nm red needs OD2+ at 600-700 nm
- Never operate without eye protection
Conduct Your First Test
- Put on goggles
- Point laser at a non-reflective black surface
- Activate for 1 to 2 seconds
- Observe beam and adjust focus
- Try burning paper or wood
Warning: Never point at people, animals, or vehicles. Pointing at aircraft is a federal crime.
Follow Legal and Safety Guidelines
Burning lasers are Class 4 devices, the most dangerous category.
Follow Critical Safety Rules
- Always wear goggles
- Operate in a fire-safe, enclosed space
- Keep a fire extinguister or water nearby
- Store defocused with battery removed
- Label device: “DANGER: HIGH-POWER LASER”
- Keep away from children
Check Local Laws
- Many regions ban lasers over 5 mW without special permits
- Possession or misuse can lead to fines or jail time
- Never use in public or near airports
Not a toy: Treat it like a firearm or power tool.
Maintain and Troubleshoot Your Laser
Keep your laser working long-term with simple care.
Clean Lens Regularly
- Use lens cloth or compressed air
- Avoid touching the glass surface
- Wipe with isopropyl alcohol if dirty
Fix Common Problems
| Issue | Cause | Fix |
|---|---|---|
| No light | Dead battery or loose wire | Test voltage, check connections |
| Weak beam | Poor focus or low current | Adjust lens, measure driver output |
| Overheating | No heat sink or long use | Add sink, limit to 30-second bursts |
| Intermittent power | Bad switch or solder joint | Reflow joints, replace switch |
Prevention: Inspect connections monthly and store in a dry environment.
Key Takeaways for Building a Burning Laser
- 445 nm blue diodes are best for burning applications
- Always use a driver, never connect directly to battery
- Focus is everything. A tight dot makes the burn possible
- 18650 batteries with boost driver provide optimal power
- Heat sinks and burst use prevent failure
- Laser goggles are non-negotiable
- Follow laws and safety rules always
When built correctly, your laser can cut plastic, engrave wood, and ignite materials at 500 meters. But with great power comes great responsibility. Build with care, test safely, and never underestimate the risks.
Frequently Asked Questions About Making a Burning Laser
What power level do I need to burn materials?
You need at least 300 mW to 1 watt for practical burning capability. Below 100 mW, the laser won’t ignite or damage most materials.
Can I use a laser pointer to burn things?
No. Standard laser pointers emit only 1 to 5 mW, far below the power needed for burning. You need a high-power diode specifically rated for burning applications.
How dangerous is a burning laser to my eyes?
Extremely dangerous. Class 4 lasers can cause permanent eye damage in fractions of a second, even from scattered reflections. Always wear wavelength-specific safety goggles.
Is it legal to build a burning laser?
Laws vary by jurisdiction. Many areas restrict or ban lasers over 5 mW. Check your local regulations before building or using a high-power laser.
How long does a burning laser diode last?
With proper current regulation, heat management, and intermittent use, diodes can last 10,000+ hours. Without cooling, failure can occur within minutes.
Can I power a burning laser with a 9V battery?
Not recommended. 9V batteries have low energy density and poor runtime. A 18650 lithium-ion battery provides much better performance and longer operation.