How to Fix Laser Pointer Button Issue
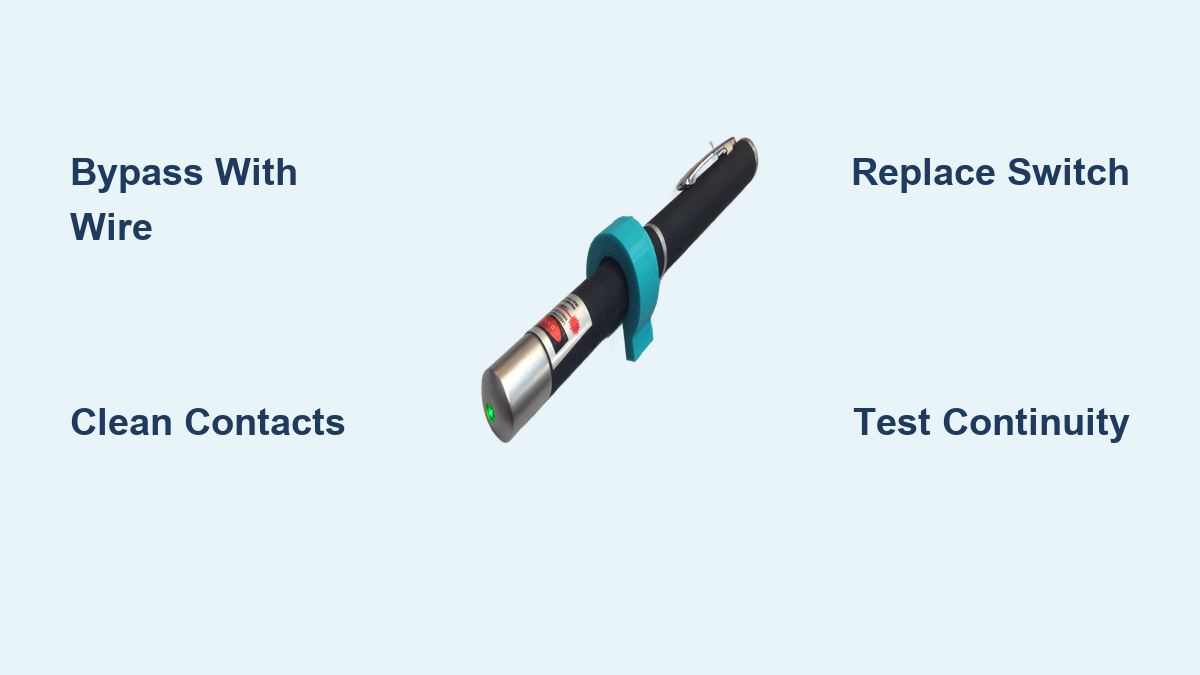
Is your laser pointer unresponsive when you press the button? You are not alone. A faulty laser pointer button is one of the most common issues users face, especially with budget models. The problem often lies not with the laser diode or battery, but with the switch mechanism itself. When the button fails, you might experience no response, flickering light, or the need to press at just the right angle to make it work. This guide will show you how to diagnose, clean, and fix a laser pointer button using proven methods from real-world repairs.
Whether you are using a 5mW presentation pointer or a high-power 3000mW green laser, this step-by-step repair framework applies to most common models. You will learn how to test the switch, restore contact conductivity, replace the switch if needed, and create workarounds when repair is not possible.
Confirm the Button Is the Problem
Before opening the laser, rule out simpler causes. Many users assume the switch is broken when the real issue is power-related. Following a systematic diagnostic process saves time and prevents unnecessary disassembly.
Test With Fresh Batteries
Start by inserting new, fully charged batteries of the correct type. Even if the old ones seem fine, weak voltage can mimic switch failure. Use a multimeter to check battery output. Most laser pointers use 3V to 3.7V power sources, typically from AAA, AA, 10440, or 16340 cells.
If the laser still does not turn on after swapping batteries, move to the next diagnostic step.
Swap the Tail Cap
On tail-cap-activated lasers, the switch is built into the cap. Try using a working tail cap from an identical model. If the laser turns on, your original cap’s switch is faulty. This simple test eliminates the driver board as the problem source.
Bypass the Switch With a Wire
This is the definitive test to confirm switch failure. If the laser activates when bypassed, the switch is definitely the culprit.
- Insert the batteries into the laser.
- Use a metal tool such as a paperclip, wire, or tweezers to bridge the circuit.
- Touch the center tip (positive) and the side threads (negative) of the battery compartment.
- If the laser lights up, even briefly, the switch is failing and not completing the circuit properly.
Measure Current Flow With a Multimeter
Set your multimeter to DC current (200mA range) for this test.
- Connect the multimeter in series by placing the red probe on battery positive and the black probe on the switch contact.
- Press the button firmly.
- No current reading indicates the switch is not completing the circuit.
Open the Laser Safely
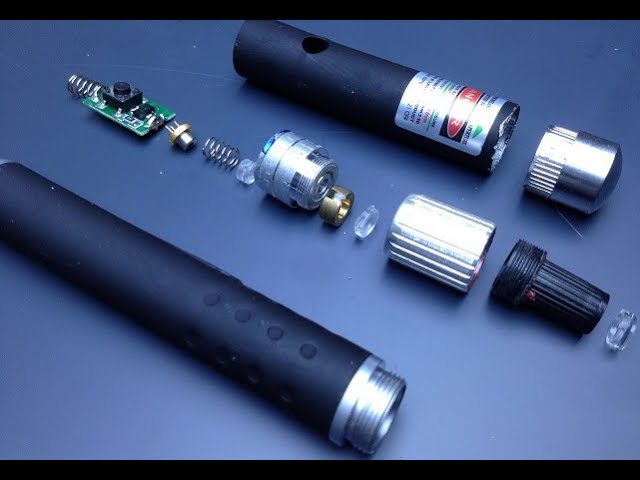
Now that you have confirmed the switch is faulty, disassemble the unit carefully. Many lasers are not designed for user service, so proceed with patience and the right tools.
Identify the Switch Location
Most lasers use one of two switch types. Tail-cap switches are located at the base and activated by pressing. Side-click switches sit on the barrel and are common in pen-style lasers. Locate the seam or access point near the button before proceeding.
Remove the Housing
Use appropriate tools based on your laser construction.
- Use a plastic pry tool or needle-nose pliers for press-fit caps
- Apply gentle twisting for threaded housings
- Use a low-setting heat gun if the switch is epoxied to soften the adhesive first
Avoid excessive force. Aluminum housings dent easily, and plastic components can crack under pressure.
Expose the Switch Mechanism
Look for small side holes or clips holding the switch casing in place. You may also find soldered wires connecting to a driver board or press-fit and glued mounting. Use a thin needle or dental pick to gently separate the switch housing and expose the internal contacts.
Clean the Switch Contacts
Most button failures stem from oxidation or dirty contacts rather than mechanical breakage. Cleaning is often successful and avoids replacement costs.
Inspect for Corrosion
Open the switch and examine the interior carefully. Look for black or greenish discoloration on metal contacts. Check for pitting or carbon buildup. Even if the button feels normal externally, internal contacts may be degraded and causing the failure.
Sand and Resurface the Contacts
You do not need to replace the switch immediately. Try cleaning first, as this works approximately 70% of the time.
Tools needed include fine-grit sandpaper (600+), a small metal file, isopropyl alcohol (90% or higher), cotton swabs, and a lint-free cloth.
- Gently abrade both contact surfaces with sandpaper or file.
- Focus only on the conductive areas and remove a thin layer.
- Wipe away metal dust with a dry swab.
- Soak a cotton swab in alcohol and clean both contacts thoroughly.
- Allow it to dry completely before reassembly.
Reassemble and Test
Snap the switch housing back together carefully.
- Reinstall the switch in the laser.
- Insert batteries.
- Press the button and observe if the laser activates.
Test stability by pressing multiple times and checking for flickering. Use a multimeter to test continuity by setting it to continuity mode, probing both switch terminals, and pressing the button. You should hear a steady beep when the circuit is complete.
Replace the Faulty Switch

If cleaning fails, replace the switch. This is necessary when the switch is physically damaged or cleaning does not restore function.
Identify the Switch Type
Check for markings on the switch. Common types include 6x6mm tactile switches (most common in pen lasers), self-locking latching switches that click on and off, and momentary push-buttons that only activate while pressed. Take photos if the switch is unmarked for reference when sourcing a replacement.
Remove the Old Switch
Three common mounting types exist, each requiring a different approach.
For press-fit switches, gently pull out with tweezers or pliers. Slight heating can help loosen friction. For epoxy-secured switches, apply low heat from a heat gun or hair dryer to soften the adhesive. Use a small screwdriver to lift carefully, expecting minor housing damage. For soldered switches, use a soldering iron and desoldering pump. Heat each joint, remove the solder, and lift wires or switch legs gently. Avoid overheating the driver board.
Install the New Switch
Match the original in size, function, and pin configuration.
For wired switches, strip wire ends and solder to the new switch, matching polarity if applicable. For PCB-mounted switches, insert the new switch into the holes and solder each pin. Trim excess leads with wire cutters.
Test Before Closing
Do not reassemble the housing yet.
- Insert batteries into the laser.
- Press the new button.
- Confirm stable activation without flickering.
If it works, close the housing. If not, recheck all connections and verify the switch orientation.
Emergency Workarounds When Repair Is Not Possible
Sometimes repair is not feasible. These temporary solutions can keep your laser functional until proper repairs are possible.
Add an External Push Button
Create a remote switch by cutting wires near the original switch. Solder two leads to a momentary push-button and mount the button externally on the battery compartment. This allows you to activate the laser without using the broken internal button.
Hardwire for Continuous Use
For testing purposes only, solder a wire across the switch terminals. The laser stays on whenever powered. This method drains batteries quickly and risks overheating. Never use this workaround around people or reflective surfaces.
Upgrade to MOSFET or Reed Switch
Advanced users can install a MOSFET switch controlled by a small signal button. Alternatively, use a magnetic reed switch for contactless activation. These options are more reliable and reduce stress on mechanical parts.
Avoid Common Repair Mistakes
Even experienced tinkerers make errors that complicate repairs. Learning what to avoid saves time and prevents further damage.
Forcing the Housing Open
Many lasers are not designed to be disassembled. Using excessive force cracks plastic housing and dents aluminum. Use plastic tools and go slowly. Accept that some models simply cannot be opened without damage.
Over-Sanding the Contacts
Removing too much material prevents proper contact closure. Apply light pressure and only remove a thin layer. Less is more when resurfacing contacts.
Reassembling With Moisture
Alcohol must dry completely before reassembly. Moisture causes shorts or new corrosion. Allow at least five minutes of drying time in a warm, dry location.
Ignoring Polarity on Driver Boards
Some switches are polarity-sensitive. If the replacement does not work after installation, double-check all wiring connections against the original configuration.
Prevent Future Button Failures
Extend your laser pointer lifespan with proper care and maintenance.
Limit Continuous Use for High-Power Lasers
Lasers over 200mW generate heat that degrades nearby components. Limit continuous use to 30 to 60 seconds. Allow cooling time between uses to prevent thermal damage to the switch mechanism.
Store in Dry Conditions
Humidity causes contact oxidation. Store your laser in a sealed container with silica gel packets. Avoid leaving lasers in damp environments such as basements or bathrooms.
Clean Buttons Periodically
Every few months, wipe the button area with alcohol. Press the switch 20 to 30 times to clear minor oxidation and keep contacts functioning properly.
Use Regulated Power Supplies
For high-power lasers (3000mW or 10,000mW models), use 5VDC drivers with heat sinks. Avoid cheap batteries with unstable voltage that can stress components.
Key Takeaways for Fixing Your Laser Pointer Button
A broken laser pointer button is usually fixable with basic tools and patience. Start by bypassing the switch to confirm the fault. If the laser lights up when bridged, the switch is definitely the problem. Cleaning with fine sandpaper and alcohol restores function in approximately 70% of cases. When cleaning fails, replace the switch by matching the original size and type. Keep spare switches on hand since budget models often use low-quality components that fail repeatedly.
If repair is not possible, an external push-button provides a practical workaround. Handle your laser gently, clean contacts regularly, and store in dry conditions. With proper care, your laser pointer can last for years even with heavy use.
Frequently Asked Questions About Fixing Laser Pointer Buttons
Why does my laser pointer only work when I press the button at an angle?
This behavior indicates internal contact degradation. The switch mechanism makes partial contact only when pressure is applied at specific angles. Cleaning the contacts often resolves this issue.
Can I use any switch replacement for my laser pointer?
No. You must match the original switch in size, function (momentary vs. latching), and pin configuration. A 6x6mm tactile switch is common in pen-style lasers, but always verify specifications before purchasing.
Is it worth repairing a cheap laser pointer?
If the laser itself is functional, repair is often worthwhile. However, budget models use low-quality components that fail repeatedly. Consider whether the cost of repair exceeds the value of the laser.
How do I know if my laser pointer switch is momentary or latching?
Momentary switches only activate while pressed. Latching switches turn on with one click and off with another. Test by pressing and releasing the button to observe behavior.
Can heat damage affect laser pointer buttons?
Yes. High-power lasers generate heat that degrades nearby components, including the switch. Limit continuous use and allow cooling time between sessions to prevent thermal damage.