How to Choose a Laser Level: Quick Guide
If you have ever spent hours trying to hang shelves straight, alignment frustrations can quickly turn a simple project into a major headache. A laser level transforms guesswork into precision, helping you achieve perfect results whether you are installing cabinets, laying tile, or tackling outdoor grading work. How to choose a laser level depends on understanding your project needs, accuracy requirements, and the features that actually deliver value versus marketing hype.
This guide breaks down every critical factor, from laser types and accuracy specs to battery life, durability ratings, and smart features. By the end, you will know exactly which model matches your work, avoiding overspending on unnecessary features while ensuring you never compromise on precision.
Match Laser Type to Your Project

Choosing the right laser starts with understanding which type serves your typical job scope. Using the wrong category can slow you down or introduce errors that cost time to fix.
Dot Lasers for Point Transfer
Dot lasers project one or more stationary reference points onto surfaces. These compact tools excel at transferring precise points across rooms, making them ideal for aligning electrical outlets, plumbing fixtures, ceiling hangers, or conduit runs. Electricians and HVAC technicians favor these for vertical and horizontal point alignment because they are lightweight, affordable, and highly portable.
Best uses include drop ceiling installations, running conduit and pipe, and transferring reference points from floor to ceiling. The key limitation is that dot lasers do not create continuous lines. You must manually extend points with a pencil or straightedge when continuous reference lines are needed.
Line Lasers for Interior Alignment
Line lasers project straight beams across walls and floors, and they come in three configurations that serve different needs.
Single-line lasers emit one beam, either horizontal or vertical. These work well for basic tasks like hanging a single shelf or checking a baseboard. They are simple and low-cost but limited in versatility.
Cross-line lasers emit intersecting horizontal and vertical beams, forming a crosshair at 90 degrees. This configuration is essential for cabinet installation, tiling, door framing, and any task where squareness matters. The major benefit is that both axes are visible at once, eliminating the need to rotate the unit.
Multi-line lasers, specifically 3×360° or 4×360° models, project continuous 360-degree planes around the entire room. A 3×360° unit provides one horizontal and two vertical planes, while a 4×360° adds a second horizontal plane for multi-level work. These are ideal for drop ceiling grids, wall paneling, multi-story renovations, and flooring alignment. You set the laser once and see reference lines on all walls without repositioning.
Rotary Lasers for Outdoor and Grading
Rotary lasers spin a single beam 360 degrees, creating a level plane across large outdoor areas. When paired with a laser detector, they can reach ranges up to 1,000 feet, making them essential for site preparation, concrete forms, and drainage work.
These lasers matter because they work in bright sunlight when used with a receiver, enable slope settings for driveways and roof pitches, and transfer elevation across uneven terrain. They are best for concrete contractors, landscapers, surveyors, and foundation builders. Avoid using rotary lasers for fine interior work because the beam is too dispersed for detailed alignment tasks.
Prioritize Accuracy for Professional Results
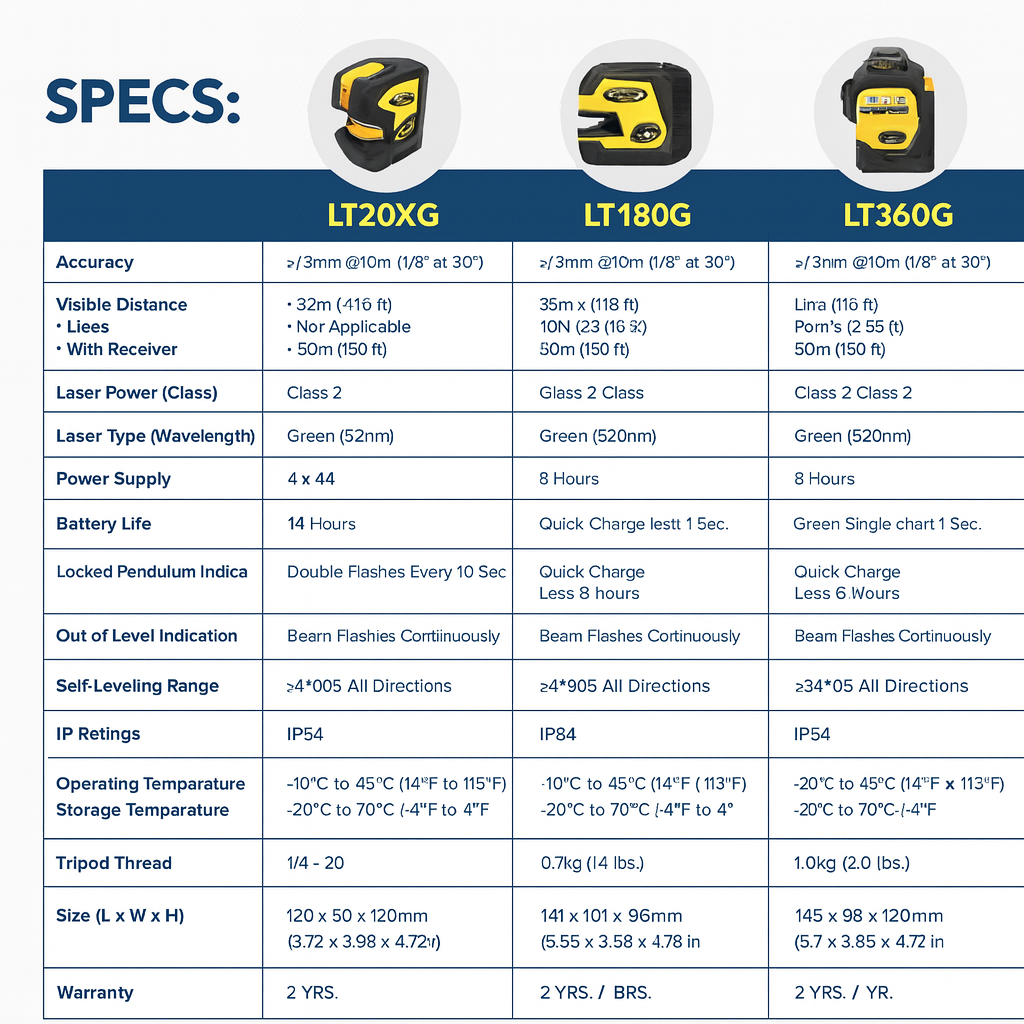
Accuracy determines how true your laser stays over distance, and it is expressed as ±X inches at Y feet or ±X mm at Y meters. Small deviations compound over long distances. A ±1/8″ error at 30 feet becomes a 1-inch gap over 240 feet, which is enough to ruin a tile layout or misalign a foundation.
Accuracy tiers break down by use case. Consumer-grade lasers offer ±1/8″ at 30 feet, which works for picture hanging and basic shelving. Mid-range lasers provide ±1.5 mm at 10 meters, suitable for tiling, cabinetry, and drywall. Professional-grade lasers deliver ±0.5 mm at 10 meters or better, required for structural framing and surveying.
Pro Tip: Always verify calibration before critical jobs. Recalibrate after drops or rough handling to maintain accuracy.
Choose Self-Leveling Over Manual
The leveling mechanism significantly impacts setup speed and reliability.
Manual leveling uses bubble vials where you adjust the device until the bubble centers. This approach is slow, prone to human error, and unreliable on uneven floors. It only suits occasional DIY use.
Self-leveling uses an internal pendulum or servo mechanism to auto-align within ±3° to ±5° of level. Once stable, the beam locks in place. This delivers fast one-button setup, eliminates user error, and maintains consistency across relocations. Most self-leveling models emit flashing lights or beeps when out of range, which prevents mistakes.
The lock function disables auto-leveling for manual slope adjustments, useful when grading a patio or setting a ramp. Self-leveling is the standard for professionals, frequent use, and uneven surfaces.
Red vs. Green Laser: Visibility Matters
The beam color affects visibility more than most users realize.
Red lasers are more affordable and energy-efficient. They draw lower power, which means longer battery life, and they cost less to produce. Red lasers work fine in low-light indoor settings but are hard to see in daylight or bright rooms. The beam fades quickly at distance and has limited outdoor usability.
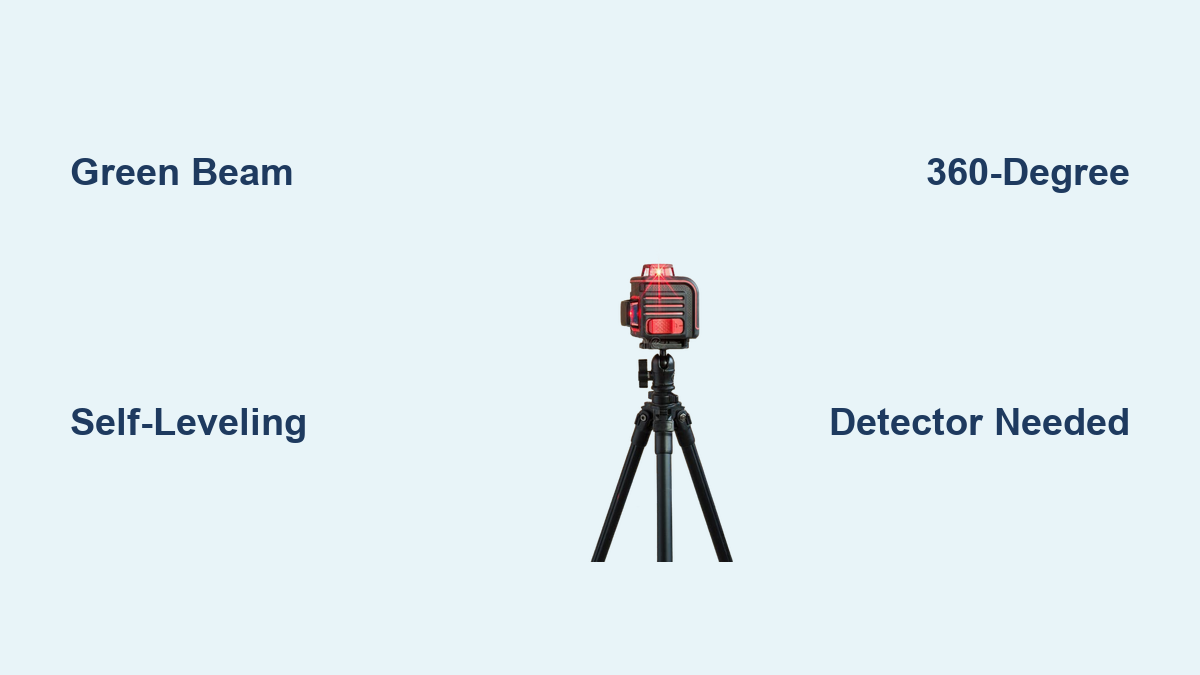
Green lasers appear up to four times brighter to the human eye because our eyes are most sensitive to green light at approximately 520 nm. This brightness makes green beams visible in daylight and large rooms, providing clearer lines for tiling, framing, and cabinetry. The downsides are higher power consumption, shorter battery life, and more expensive production costs.
Verdict: If you work in well-lit spaces or plan occasional outdoor use, green is worth the upgrade.
Extend Range with Detectors and Pulse Mode
Indoor visibility typically maxes out at 50 to 100 feet. Beyond that distance or in direct sunlight, you need help seeing the beam.
Laser detectors, also called receivers, sense the pulsing laser beam and emit beeping sounds that increase in frequency as the detector approaches alignment. When centered on the beam, the detector emits a steady tone. Detectors are essential for outdoor work because they allow use in full sun and extend range to over 1,000 feet with rotary lasers. They are critical for grading, drainage, and foundation work.
Some models include pulse mode, which modulates the beam for better detection. The beam remains invisible to the naked eye in this mode. Many rotary lasers include a detector, while budget models may require a separate purchase.
Power Smart: Batteries That Last
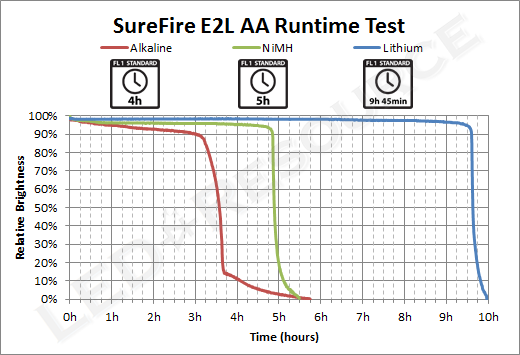
Battery type affects runtime, cost, and job continuity.
Alkaline batteries using AA or AAA cells are readily available and fine for occasional use. However, they lose power quickly with green lasers or in cold weather, making them unsuitable for full-day jobs.
Rechargeable lithium-ion batteries represent the professional standard. They offer longer runtime of 4 to 6+ hours and perform better in cold conditions. Many high-end models use integrated 4 Ah batteries that prove cost-effective over time.
Hybrid systems accept both rechargeable and standard batteries, which is perfect for remote sites where charging is not possible. Some lasers also include USB power input, allowing you to run the laser while charging during marathon tiling or framing sessions.
Demand Durability: IP Ratings and Drop Protection

Construction sites are tough environments, and your laser should be built to survive.
IP ratings indicate dust and water resistance. IP54 means dust-protected and splash-resistant, suitable for indoor and light outdoor use. IP65 or higher means dust-tight and resistant to water jets, which is necessary for heavy outdoor use. Avoid using any laser in heavy rain unless it is rated IP65 or higher.
Critical Tip: Always wipe down and air-dry your laser after wet use. Storing a damp unit in a case causes condensation that damages optics and circuitry.
Most professional models survive drops from 3 to 6 feet thanks to rubber bumpers and reinforced housings. Look for sealed optics to prevent internal dust buildup.
Mount It Right: Tripods, Magnets, and Poles
Stable mounting ensures accurate results.
Tripod mount is the standard for serious laser work. Most units have a 1/4″-20 or 5/8″-11 thread for universal tripod compatibility. Tripods provide height adjustment, smooth rotation, and a level base on uneven floors.
Magnetic bases attach directly to metal studs, beams, or ductwork, keeping the laser off the ground and out of your way. These are invaluable for wall and ceiling work when you need hands-free operation.
Ceiling poles like the Bosch Laser Pole extend to ceiling height and lock in place. They include built-in scales for precise elevation and eliminate the need for a tripod in tight spaces. These work well for suspended ceiling work and solo operators.
Height adjustment stands allow fine vertical tuning and rotational control. Magnetic clamps let you reposition quickly after accidental bumps during tile or brick work.
Essential Accessories for Real-World Use
Do not buy a laser without considering these add-ons.
A laser detector is non-negotiable for outdoor or long-range work. It turns invisible beams into audible feedback so you can work in bright conditions.
Laser enhancement glasses use tinted lenses to improve contrast. They are especially useful with green lasers in bright rooms. These glasses do not make the beam brighter but reduce eye strain.
A carrying case protects the internal pendulum during transport. Always lock the pendulum before moving the unit.
Mounting hardware includes wall brackets, magnetic bases, and pole adapters, which increase versatility.
Smart Buy: Look for kits that bundle laser, tripod, detector, glasses, and case. You will save 10-20% compared to buying separately.
Trust Reputable Brands with Support
Not all brands deliver equal reliability or service.
Bosch offers rugged build, innovation, and strong support, best for professionals. DeWalt provides durable tools trusted by trades, ideal for DIYers and light professionals. Stanley delivers reliable performance with value-focused pricing, suited for homeowners. Huepar provides feature-rich green lasers with app control, appealing to tech-savvy users. Topcon offers high precision and survey-grade equipment for engineers and surveyors.
Warranty Tip: Look for 2-5 year coverage. Some brands offer lifetime calibration support, which is critical for maintaining accuracy over years of use.
Safety First: Protect Eyes and Equipment
Laser levels are safe when used correctly, but risks exist.
Most laser levels are Class II or IIIA lasers. Brief exposure is low-risk, but never stare directly into the beam. Precautions include avoiding reflective surfaces like glass and mirrors, using caution around children, and following local rules on outdoor laser use near aircraft.
For environmental care, remember that alkaline batteries fail faster in cold weather. Use lithium-ion batteries in winter conditions. Do not leave the laser in direct sun because heat damages internal components. Always dry thoroughly before storage to prevent moisture damage.
Advanced Features That Pay Off
High-end models offer smart upgrades worth considering.
Bluetooth and app control, found in models like the Huepar S04CG, let you remotely adjust settings, save reference lines, and share project data. This is handy for complex layouts or team coordination.
Slope setting allows manual or automatic slope calibration, perfect for drainage installation, ramps, and roof pitches. Digital displays show percentage or degrees for precise angles.
360-degree projection provides full spherical coverage and eliminates repositioning. It projects horizontal, vertical, and overhead planes, ideal for commercial drop ceilings or multi-level interiors.
Maintenance for Long Life
A well-maintained laser lasts over a decade.
Calibrate regularly by checking accuracy before each major job and recalibrating after impacts. Store properly by locking the pendulum, removing alkaline batteries if storing long-term, and keeping the unit in a dry, temperature-stable environment. Clean gently using a microfiber cloth on the lens and a damp cloth with mild soap on the body. Never immerse the laser.
Real-World User Insights
Tradespeople agree that laser levels save time but are not always essential.
Carpenters praise cross-line lasers for kitchen installations and tiling projects. Handymen use them daily for consistent reference points. Veterans note that while string lines and spirit levels work, lasers speed up solo work significantly. Huepar users highlight strong green beams, long battery life, and Bluetooth convenience.
Reality Check: For simple jobs, a $50 red laser may suffice. For frequent or precision work, invest in green, self-leveling, and rechargeable power.
Budget Smart: Get the Right Value
The budget range of £50-£90 covers occasional DIY with basic red cross-line lasers like the DeWalt DW088K or Stanley CROSS90 RED. These are durable, simple, and proven for shelving, picture hanging, and light remodeling.
The mid-range of £100-£200 suits serious DIY and pros with green lasers, rechargeable batteries, app control, and magnetic mounts like the Huepar S04CG or 904DG. These handle tiling, cabinetry, drop ceilings, and occasional outdoor use.
Professional models from £200-£800 cover heavy-duty work with rotary or 360° lasers, detectors, rugged cases, and slope functions like the Bosch GLL 360 or Topcon RL-H5A. These are for site grading, concrete work, and surveying.
Value Tip: For most handymen, spending over £200 is unnecessary. A £130-£180 green cross-line laser offers the best balance of performance and cost.
Final Selection Checklist
Answer these questions to pick the perfect laser.
- Indoor or outdoor use? If outdoor, you need green laser plus detector.
- Need full-room coverage? Choose 3×360° or 4×360° if yes.
- Working alone? Magnetic mounts and ceiling poles help.
- Need slope or grading? Choose rotary with slope function.
- High brightness required? Green laser plus enhancement glasses.
- Frequent use? Rechargeable battery plus tripod plus case.
Frequently Asked Questions About Laser Levels
What is the main difference between red and green laser levels?
Green lasers appear up to four times brighter than red lasers to the human eye because our vision is most sensitive to green light. This makes green lasers easier to see in daylight and bright indoor conditions, though they consume more power and cost more.
Do I need a laser detector for outdoor work?
Yes, a laser detector is essential for outdoor work. It detects the laser beam in bright sunlight or over long distances where the beam becomes invisible to the naked eye. Detectors emit audible beeps that guide you to alignment.
How accurate are consumer-grade laser levels?
Consumer-grade laser levels typically offer accuracy of ±1/8″ at 30 feet, which is sufficient for home projects like hanging pictures and basic shelving. Professional-grade models provide ±1/16″ or better for precision work like tiling and cabinetry.
Can I use a laser level in the rain?
Many laser levels are rated IP54 or higher, which means they can handle light rain and splashes. However, you should dry the unit thoroughly before storing it to prevent internal condensation from damaging optics and electronics.
What does self-leveling mean on a laser level?
Self-leveling means the laser uses an internal pendulum or servo mechanism to automatically align the beam within a few degrees of level, typically ±3° to ±5°. This provides fast setup and eliminates user error compared to manual bubble vial adjustment.
How long do laser level batteries last?
Battery life depends on the type and usage. Alkaline batteries last 3-4 hours with continuous red laser use. Rechargeable lithium-ion batteries typically provide 4-6+ hours of runtime and perform better in cold conditions.
Key Takeaways for Choosing the Right Laser Level
How to choose a laser level comes down to matching the tool to your actual work, not marketing hype. For DIYers, a self-leveling red cross-line laser handles basic tasks well. For finish carpenters and tilers, invest in a green 3×360° model for speed and accuracy across full rooms. For outdoor contractors, a rotary laser with detector and IP65 rating is mandatory.
Prioritize green beam visibility for better visibility in all conditions, self-leveling for fast and error-free setup, rechargeable power for all-day runtime, and durability with proper IP ratings and drop protection. Avoid ultra-cheap models because they cost more in rework than the initial savings. With proper care, a quality laser level delivers pinpoint accuracy for over ten years, paying for itself in time saved and mistakes avoided.