How to Laser Engrave Aluminum: Quick Steps
Laser engraving aluminum is a powerful, precise way to create permanent, high-contrast marks on metal surfaces. Whether you’re personalizing gifts, creating business cards, or marking industrial parts, understanding the correct workflow ensures clean, durable results every time. The key challenge lies in aluminum’s natural reflectivity and thermal properties, which can cause poor absorption or even damage your laser if not handled properly. This guide walks you through every step, from selecting the right aluminum and laser type to executing flawless engravings with safety and efficiency.
You’ll learn how to achieve deep black marks, avoid common mistakes, and optimize your settings for professional results. Whether using a fiber laser for bare metal or a diode laser for coated surfaces, this comprehensive guide covers the techniques that separate amateur attempts from expert-quality engravings.
Choose the Right Aluminum Type for Laser Engraving
Not all aluminum responds the same to laser engraving. The surface finish and coating determine compatibility, contrast, and the preparation required to achieve quality results.
Identify Anodized vs. Bare Aluminum
Anodized aluminum features a porous oxide layer that absorbs laser energy easily, making it the ideal choice for engraving. When the laser removes the colored top layer, it reveals the shiny silver metal underneath, creating high-contrast, visually striking results. This type works well with fiber, CO₂, and diode lasers without any pretreatment needed.
Bare aluminum reflects most laser wavelengths, especially CO₂ at 10.6 µm and blue diode at 450 nm, which reduces absorption and increases the risk of back-reflection damaging your optics. To engrave bare aluminum successfully, use a fiber laser at 1064 nm or apply a laser marking spray like CerMark or Brilliance before processing.
Select Powder-Coated Aluminum for Aesthetic Contrast
Powder-coated aluminum features a polymer-based finish applied electrostatically and cured under heat. Laser engraving ablates this top layer, exposing the bare metal beneath for a clean two-tone effect. This option works perfectly for signage, architectural panels, and promotional items. While not as heat-resistant as anodized aluminum, it offers broader color options and processes easily with CO₂ lasers.
Verify Your Aluminum Type Quickly
If you’re unsure whether your aluminum is anodized or simply coated, run a quick test using a 5W blue diode laser at 100–300 mm/s with 100% power. If it engraves cleanly with visible contrast, the surface likely has a paint-like coating. True anodized layers respond similarly but offer superior durability, while bare aluminum will show faint or no marks without pretreatment.
Pick the Best Laser for Your Aluminum Project
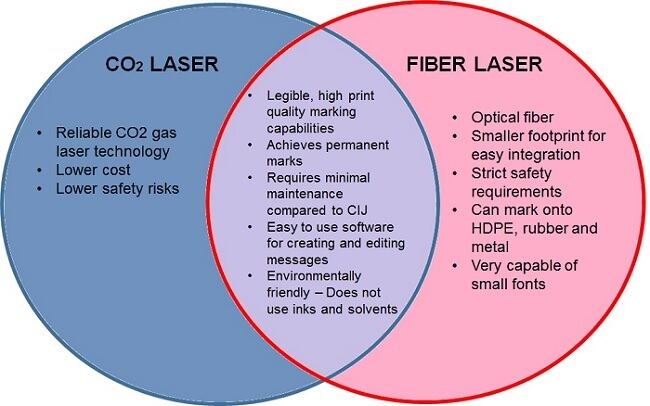
Your laser type determines what kind of aluminum you can engrave and how deeply you can mark. Matching the right technology to your material is essential for professional results.
Use Fiber Lasers for Bare Metal
Fiber lasers emit at 1064 nm, a wavelength strongly absorbed by metals like aluminum. They deliver high peak power in pulsed modes, enabling deep engraving, black oxide marking, and even color changes on certain alloys. A 20–50W MOPA fiber laser is ideal for industrial applications such as part serialization, QR codes, and UDI labels.
MOPA technology allows independent control of pulse width and frequency, unlocking advanced effects like true black marks and multi-color engraving on stainless steel and aluminum. This makes fiber lasers the top choice for professional metal marking.
Run CO₂ Lasers on Coated Surfaces Only
CO₂ lasers at 10.6 µm work poorly on bare aluminum due to reflectivity and low absorption. However, they excel at engraving anodized and powder-coated aluminum. At 30–150W, they cleanly remove surface coatings without damaging the base metal. These lasers are also ideal for mixed-material shops handling wood, acrylic, and coated metals.
Never use CO₂ lasers on untreated bare aluminum, as the risk of reflection-induced lens or laser damage is extremely high.
Try Diode Lasers for DIY Projects
Blue diode lasers around 450 nm are affordable and compact, making them popular among hobbyists. While too weak for bare metal, they work well on anodized or coated aluminum when set to 100% power and low speed of 100–300 mm/s. Models like the LaserPecker LP4 or LP5 with optional 1064 nm fiber modules expand capabilities for light metal engraving.
For best results, pair your diode laser with LightBurn or EzCad software and always perform test engravings first on scrap material.
Consider UV and Picosecond Lasers for Precision
UV lasers at 355 nm and picosecond lasers with ultra-short pulses offer cold marking with minimal heat transfer. This makes them ideal for sensitive electronics, medical devices, or micro-text engraving. They prevent thermal distortion and produce extremely fine details down to 0.0027 mm. Though expensive, they’re unmatched for anti-counterfeiting, serial numbers, and high-end industrial applications.
Prepare Your Design for Clean, Precise Marks
A well-prepared design ensures crisp, readable engravings with consistent depth and contrast. Taking time here saves frustration later.
Use Vector Files for Sharp Edges
Always work with vector-based software like LightBurn, CorelDRAW, or Adobe Illustrator. Raster images lose quality when scaled, while vectors maintain precision at any size. Convert text to outlines to prevent font issues during transfer.
For QR codes, use a trusted generator and embed useful data like Wi-Fi credentials or website links. Always test scan with a smartphone before engraving to ensure readability.
Organize Layers for Control
In LightBurn or EzCad, place different elements like text, logos, and QR codes on separate layers. This lets you assign unique settings like power, speed, and passes to each component. For example, text might need slower speed for darkness, while a QR code requires uniform fill to remain scannable.
Add a bounding box matching your material size to align the design accurately on the bed and prevent misalignment issues.
Set Fill Patterns for Uniform Marks
Use fill mode with tight hatch spacing of 0.01–0.15 mm for solid black areas. For black oxide marks on anodized aluminum, a 0.02–0.05 mm line distance at 50–80 kHz frequency yields the best results. Avoid overlapping paths to reduce overheating.
For grayscale images, convert to dithered bitmap with 2000 DPI resolution for detailed photo engraving.
Set Up the Laser Machine Correctly
Proper setup prevents errors, ensures safety, and improves engraving quality. Follow these steps before every session.
Clean Optics and Secure Material
Before starting, clean the lens and mirrors with isopropyl alcohol and a lint-free cloth. Dust or residue can scatter the beam, causing weak or uneven marks. For CO₂ lasers, pay special attention to mirror alignment.
Clamp the aluminum securely or use a vacuum bed to prevent movement during engraving. Even slight shifts ruin alignment, especially on small items like business cards.
Enable Air Assist and Fume Extraction
Turn on air assist to blow debris away from the lens and reduce ignition risk. Pair it with a fume extractor equipped with HEPA and activated carbon filters to capture aluminum oxide nanoparticles and VOCs released during engraving.
Never operate without proper ventilation, as aluminum fumes are toxic and harmful to breathe.
Level the Bed and Focus Accurately
An uneven bed causes inconsistent depth across your engraving. Use a feeler gauge or manual Z-probe to level the surface before processing. Then focus the laser by lowering the head until a piece of paper sits just under the lens, firing a low-power pulse around 2%, and adjusting the Z-height until the dot appears sharpest.
For curved objects like dog tags or cans, use a rotary attachment and enable auto-focus if your machine supports it.
Optimize Laser Settings for Perfect Results

Correct parameters make the difference between a faint scratch and a bold, permanent mark. Use these starting points and adjust based on your results.
Fiber Laser Settings for Anodized Aluminum
For black marks, use 60–80% power at 800–1200 mm/s with 50–80 kHz frequency over 2–3 passes. For white marks, reduce to 20–40% power at 2000–3000 mm/s with 20–30 kHz frequency for just one pass.
White marks rely on micro-roughness to scatter light, while black marks use controlled oxidation. Adjusting frequency around 50 kHz produces optimal deep black results.
Diode Laser Settings for Coated Aluminum
When using a diode laser on coated aluminum, set power to 100%, speed to 100–300 mm/s, and resolution to 2000 DPI. One pass is typically sufficient. Remember that diode lasers only work on anodized or powder-coated surfaces, never on bare aluminum.
Start with 300 mm/s for QR codes and 200 mm/s for text, then adjust speed to increase or decrease contrast as needed.
CO₂ Laser Settings for Powder-Coated Aluminum
For powder-coated aluminum with a CO₂ laser, use 30–60W power at 300–800 mm/s with a single pass. This cleanly ablates the coating and exposes the bright metal beneath. No pretreatment is needed, making this approach ideal for large signage and batch processing.
Achieve True Black Marks on Bare Aluminum
To engrave true black on untreated aluminum, apply Brilliance Laser Ink evenly from 6–12 inches away and let it dry for 3–4 minutes. Then use a fiber laser with approximately 33% power on a 30W system, speed of 110 units, 50 kHz frequency, 0.025 mm line distance, and focus slightly above the surface.
This technique creates a durable, chemical-resistant black mark ideal for industrial tags and awards.
Execute the Engraving Process Safely
Safety is non-negotiable when working with lasers and metal. Take these precautions seriously.
Wear Proper Protective Equipment
Wear laser safety glasses with OD4+ rating matched to your laser’s wavelength, whether 1064 nm or 450 nm. Use an N95 mask or air purifier with HEPA and carbon filtration. Keep heat-resistant gloves nearby for handling hot parts.
Consumer-grade glasses often lack sufficient protection, so invest in certified eyewear from a reputable supplier.
Enclose the Laser System
Use a Class 1 enclosure or filtered lid to contain beam scatter and fumes. Post warning signs during operation and never leave the machine unattended while running.
Prevent Fires
Aluminum can ignite under intense laser exposure. Keep a Class D fire extinguisher nearby specifically designed for metal fires. Use air assist to reduce heat buildup and keep flammable materials away from the work area.
Post-Process and Verify Engraving Quality
After engraving, verify durability and appearance to ensure your work meets professional standards.
Clean and Inspect Engraved Parts
Let the piece cool completely, then brush off residue with a soft nylon brush. For Brilliance-treated parts, rinse under water and dry thoroughly. Check the engraving under angled light to assess contrast and depth accurately.
Test QR Code Readability
Scan every QR code with multiple devices to ensure it reads correctly. If unreadable, re-engrave with slower speed, higher power, or tighter fill spacing until the code scans reliably.
Evaluate Mark Durability
Rub the mark with a Scotch-Brite pad to test abrasion resistance. A proper laser engraving should resist this test. True black marks on treated aluminum survive sandblasting, UV exposure, and chemical cleaning without degradation.
Troubleshoot Common Laser Engraving Problems
Fix problems quickly with targeted solutions to get back on track.
Fix Faint or Missing Marks
If marks appear faint or invisible, the cause is likely low power, excessive speed, or the wrong laser type for your material. Increase power, reduce speed, switch to a fiber laser, or apply marking spray to improve results.
Stop Burning or Melting
Excessive power or too many passes causes burning or melting. Lower the power, increase speed, and enable air assist to reduce heat buildup in the material.
Eliminate Inconsistent Depth
Poor focus or an uneven bed causes varying depth across your engraving. Re-level the bed, refocus the laser, and use Z-auto-focus if available to maintain consistent results.
Prevent Lens Damage
Back-reflection from bare aluminum can damage your lens. Always use marking spray or stick to fiber lasers when engraving untreated aluminum to protect your equipment.
Frequently Asked Questions About Laser Engraving Aluminum
Can I engrave bare aluminum with a CO₂ laser?
No, CO₂ lasers at 10.6 µm cannot engrave bare aluminum effectively due to high reflectivity. The laser energy reflects back toward the optics, risking damage. Use a fiber laser or apply a marking spray like CerMark or Brilliance before using a CO₂ laser on bare metal.
What laser power do I need for aluminum engraving?
For anodized or coated aluminum, a 5W diode laser works well. For bare aluminum, a fiber laser of 20–50W is recommended. Industrial applications requiring deep marks or color changes benefit from 50W+ fiber lasers with MOPA technology.
How do I get black marks on aluminum?
For anodized aluminum, use a fiber laser at 60–80% power, 800–1200 mm/s speed, and 50–80 kHz frequency with 2–3 passes. For bare aluminum, apply Brilliance Laser Ink and use a fiber laser with approximately 33% power at 50 kHz frequency.
Why is my laser engraving fading or scratching off?
This happens when the laser only surface marks rather than properly engraving the material. Increase power, reduce speed, or add more passes. On bare aluminum, you may need to apply a marking spray to create permanent bonds.
Can I engrave curved aluminum objects like dog tags?
Yes, use a rotary attachment to hold cylindrical or curved objects. Enable auto-focus if available, and adjust your design to account for the curved surface. Test on scrap material before committing to final pieces.
Is laser engraving aluminum safe at home?
Yes, with proper precautions. Use certified laser safety glasses, ensure adequate fume extraction with HEPA and carbon filters, keep the area enclosed, and have a Class D fire extinguisher nearby. Never operate without proper ventilation.
Key Takeaways for Successful Aluminum Laser Engraving
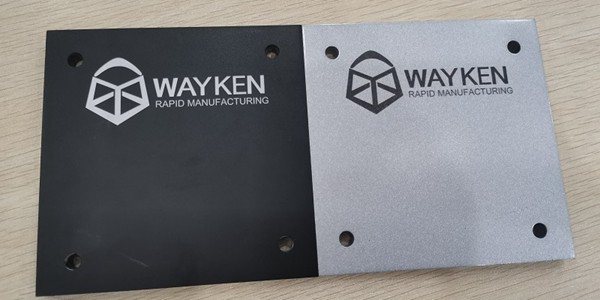
Laser engraving aluminum delivers professional, permanent results when you match the right laser to the right material and follow precise workflows. Choose fiber lasers for bare metal, use marking sprays when needed, and always verify results with real-world testing.
The most critical factors for success are selecting the correct aluminum type for your project, using the appropriate laser wavelength, and optimizing settings through test engravings. Anodized aluminum offers the best contrast without pretreatment, while bare aluminum requires fiber lasers or surface coatings for clean marks.
With the right setup, you can produce high-contrast, durable engravings at speed, unlocking endless creative and industrial possibilities. Start with test pieces, document your successful settings, and scale up as you gain confidence.